Hello everyone!
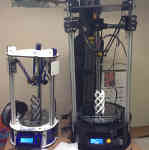
I've been back online doing more test prints after the guys at SeeMeCNC replaced my RAMBO over the holidays (truly the best customer service!). I've been getting decent simple prints, but I went to do a test part that is comprised of two halves that should fit into eachother, and alas, they do not fit together at all. The STL contains both halves and they are printed simultaneously on the bed.
[img]https://www.dropbox.com/s/zppw8yl7ilrol ... 3%20AM.jpg[/img]
Unfortunately, I do not have my slicer settings handy (was done in CURA though...)
But my question is mostly, does someone have a link to info on printing correctly dimensioned parts?
I googled for 15 minutes, but the best I could come up with were overly complicated skeinforge tutorials...I couldn't even understand the skeinforge terminology well enough to translate the concepts to CURA. Sheesh.
I'm sure some of you might be wondering if I haven't already worked with extruder calibration using the method suggested in the sticky on this forum. Unfortunately, I have, and I could not get it to work for the life of me. It seems like no matter what extrusion width (equal to desired wall thickness for hollow cube) I ask for, I couldn't get less than about .86 wall thickness when measured with calipers, though I had set it to .55 wall thickness. Reducing the flowrate multiplier did not create walls that were consistent with the requested wall thickness. Instead, it just made the print full of holes, voids, and infill that didn't overlap at all. By increasing to 1mm wall thickness/ extrusion width, I got walls that were actually closer to 1mm (something like 1.18). Again though, reducing flowrate multiplier even on the 1mm wall thickness didn't seem to result in walls that were closer to the correct dimension, only reduced the print quality.
This led me to believe that perhaps my nozzle size is quite a bit larger than the .5 it's suppose to be.
I have no accurate way of finding out.
I am happy to do some tests and provide slicing settings if someone has a test print that might help figure some of this out!
Any advice or links to resources would be immensely appreciated!
Thanks in advance!
-Daniel
Printing properly dimensioned parts?
Re: Printing properly dimensioned parts?
Actually it is fairly simple to test your nozzle size. Extrude some plastics with the nozzle well above the build plate and measure the extruded plastic with some calipers. That measurement will be the size of your nozzleRTLdan wrote:
This led me to believe that perhaps my nozzle size is quite a bit larger than the .5 it's suppose to be.
I have no accurate way of finding out.
I am happy to do some tests and provide slicing settings if someone has a test print that might help figure some of this out!
Any advice or links to resources would be immensely appreciated!
Thanks in advance!
-Daniel
PTMNBN="Printer that must not be named" - a heavily upgraded Replicator 2
-
Polygonhell
- ULTIMATE 3D JEDI
- Posts: 2417
- Joined: Mon Mar 26, 2012 1:44 pm
- Location: Redmond WA
Re: Printing properly dimensioned parts?
Actually what you'll measure will be significantly larger than your nozzle due to die swell.jmpreuss wrote: Actually it is fairly simple to test your nozzle size. Extrude some plastics with the nozzle well above the build plate and measure the extruded plastic with some calipers. That measurement will be the size of your nozzle
Depending on the plastic and temperature it wouldn't be unusual to see a free air extrusion of 0.7 or 0.8 from a 0.5 nozzle
Printer blog http://3dprinterhell.blogspot.com/
Re: Printing properly dimensioned parts?
I should have been more clear, this test works well with PLA since it doesn't swell. With ABS (and many other materials) it will be off.
PTMNBN="Printer that must not be named" - a heavily upgraded Replicator 2
-
Polygonhell
- ULTIMATE 3D JEDI
- Posts: 2417
- Joined: Mon Mar 26, 2012 1:44 pm
- Location: Redmond WA
Re: Printing properly dimensioned parts?
The only practical accurate way to measure the nozzle orifice is with a set of pin gauges, I personally use a set of small drill bits, which will get you close enough given the manufacturing tolerances. Almost all nozzles are slightly oversized, because that are rated for the drill used and a 0.5mm drill produces a hole bigger than 0.5mm.
I would be surprised if your nozzle is really significantly oversized. And FWIW you can actually print a wall significantly less than the nozzle diameter because the plastic is stretched as it gets laid down.
Honestly you're probably not going to get a good diagnosis without pictures.
The easy way to tell if you are over extruding is to print a solid cube, you only need to print about 10 layers and post an image of the result, before you take it off the bed.
Printer blog http://3dprinterhell.blogspot.com/

Re: Printing properly dimensioned parts?
PLA doesn't swell coming out of the tip? I thought it was the physics behind the melted plastic going from a pressurized environment (confined inside the nozzle being pushed out) into a lower pressure environment. So the only time you wouldn't have swell in the free air extrusion is if the material is oozing out. Just like whipped cream or cheese-wiz.
Re: Printing properly dimensioned parts?
I can't say I have done conclusive scientific testing but when I feed PLA through a new seemecnc .5 nozzle my extrusion measures exactly .50 and a .35 nozzle measures .35. It my not be a perfect measure but if you want to quickly check to see if your .5 nozzle isn't really .55 or something else way off I think this is an OK easy method. If you want to see if you .500 is really .505 something more precise would be needed.lordbinky wrote:PLA doesn't swell coming out of the tip? I thought it was the physics behind the melted plastic going from a pressurized environment (confined inside the nozzle being pushed out) into a lower pressure environment. So the only time you wouldn't have swell in the free air extrusion is if the material is oozing out. Just like whipped cream or cheese-wiz.
PTMNBN="Printer that must not be named" - a heavily upgraded Replicator 2
Re: Printing properly dimensioned parts?
Hi guys!
Thanks for your replies, and sorry for taking so long to get back.
I'm not sure why my original picture didn't post, but lets try again.
[img]http://i161.photobucket.com/albums/t222/RTLdan/image_zps7e3d569a.jpg[/img]
It's not the best picture, but the print doesn't look too bad other than the obvious fact that they are not properly dimensioned to allow them to fit together as they should.
I'll do a cube test as recommended by polygonhell and take some pictures of that.
I'm printing with ABS by the way. Purchased from SeeMeCNC.
Test cubes to follow soon...
Thanks!
-Daniel
Re: Printing properly dimensioned parts?
Just as a frame of reference...
I printed this with ABS:
http://forum.seemecnc.com/viewtopic.php?f=41&t=4097
It is properly dimensioned in two ways:
1. The circuit board is a tight fit against the two protruding prongs at the bottom of the box.
2. The lid, which in OpenSCAD is an actual "differnece" with no added tolerance does in fact fit very tightly into the box.
Other than setting a fixed extrusion width in Slic3r and attempting to calibrate the extruder to the best of my ability (which is not saying much), I did nothing special to get here.
Again, just a frame of reference.
If I were to try to extract any suggestions from my experience I'd suggest careful extruder calibration.
-
neurascenic
- Printmaster!
- Posts: 217
- Joined: Fri Nov 15, 2013 10:05 pm
- Location: Denver Colorado
- Contact:
Re: Printing properly dimensioned parts?
I wonder if size makes a difference? (not alluding to anything other than the topic)
that is 1mm to 1cm is a lot, where 1mm to 100 cm isn't.
maybe each of you should print something out of opposite scale and see what your results are.
that is 1mm to 1cm is a lot, where 1mm to 100 cm isn't.
maybe each of you should print something out of opposite scale and see what your results are.
I am a fool entrapped within my own wisdom.
Re: Printing properly dimensioned parts?
Hi Everyone,
Got back out to the shop and did a few more test cubes.
20mm hollow box, repaired in netfabb before sliced.
Slic3r settings for the .55mm hollow box:
; layer_height = 0.275
; perimeters = 1
; top_solid_layers = 1
; bottom_solid_layers = 1
; fill_density = 0
; perimeter_speed = 60
; infill_speed = 70
; travel_speed = 200
; nozzle_diameter = 0.5
; filament_diameter = 1.745
; extrusion_multiplier = 1
; perimeters extrusion width = 0.55mm
; infill extrusion width = 0.55mm
; solid infill extrusion width = 0.55mm
; top infill extrusion width = 0.55mm
G21 ; set units to millimeters
M107
M190 S70 ; wait for bed temperature to be reached
M104 S220 ; set temperature
G28 ; home all axes
G1 Z5 F5000 ; lift nozzle
M109 S220 ; wait for temperature to be reached
G90 ; use absolute coordinates
G92 E0
M82 ; use absolute distances for extrusion
Results:
[img]http://i161.photobucket.com/albums/t222/RTLdan/PhotoJan2224839PMHDR_zps2a1738a0.jpg[/img]
TOPSIDE VIEW ON BED
[img]http://i161.photobucket.com/albums/t222/RTLdan/PhotoJan2224829PM_zpsd1ff3b41.jpg[/img]
ANOTHER ANGLE ON BED
[img]http://i161.photobucket.com/albums/t222/RTLdan/PhotoJan2224915PMHDR_zps523e71a6.jpg[/img]
TOPSIDE VIEW OFF BED
[img]http://i161.photobucket.com/albums/t222/RTLdan/PhotoJan2224929PM_zpscab6d312.jpg[/img]
BOTTOMSIDE VIEW OFF BED
I'm not sure why slic3r's bottom layers aren't overlapping much. Also, layer alignment is degraded trying to print this wall at .55mm.
Actual measured wall thickness (averaged) was about .74mm. You can see, it almost looks like it's extruding too much plastic, but then there are a lot of voids too...
As a point of reference, I printed two more cubes - One in Slic3r and the other in Cura. This time I used 1mm extrusion width.
Some other minor slicing settings may also be different, but I tried to keep it pretty much the same other than extrusion width.
[img]http://i161.photobucket.com/albums/t222/RTLdan/PhotoJan2244359PMHDR_zpsaa80a7e5.jpg[/img]
BOTTOMSIDE VIEW - Slicer (top), Cura (bottom)
[img]http://i161.photobucket.com/albums/t222/RTLdan/PhotoJan2244444PMHDR_zpscf273ec4.jpg[/img]
TOPSIDE VIEW - Slicer (top), Cura (bottom)
It looks like maybe Cura is using a bit too much plastic, which would make sense because it's wall thickness is measuring an averaged 1.18 instead of 1mm. This time Slicer got remarkably close to the 1mm extrusion width with average measured wall thickness of 1.01. Still a sparse infill overlap on the bottom layer though.
And as far as the layer alignment itself, you can see on the 1mm extrusion width slic3r print that while not perfect, it's not too bad when compared with our original .55 extrusion width cube.
[img]http://i161.photobucket.com/albums/t222/RTLdan/PhotoJan2250143PM_zpsa1611922.jpg[/img]
SIDEVIEW - Slic3r, 1mm extrusion width layer alignment
Hopefully this will help in diagnosing my general print quality and especially my inability to get properly dimensioned prints.
Thanks in advance for the help!!
-Daniel
Re: Printing properly dimensioned parts?
Did some more tests today...this time with kisslicer. I turned the print speed way down to 30mm.
Also, I opened up CAD software and created a test cube myself to make sure there was nothing wrong with the model.
Same problems as before. Any prints where I set an extrusion width less than around .75mm or so still come out looking spongy with gaps and voids. Measuring the wall thickness gives a value of about .75mm. To reiterate, I'm measuring about a .75mm wall thickness for any extrusion width I choose between .55-75mm. Above .75mm it seems to actually become accurate. I.E., 1mm extrusion width seems close to 1mm.
Changing the flow ratio does not fix this -- it only creates more gaps.
(See earlier pictures for examples.)
Anyway, as I was printing cube after cube changing slicer settings, I had a thought:
Could it be that when I did my bed leveling, I calibrated with the nozzle too close to the glass plate, so that it's "squishing" the extruded filament, making the .55mm I should be seeing .74mm?
I would imagine that squishing the .55mm extrusion could cause enough displacement to both see an increased wall thickness and cause the gaps and voids since the actual volume of extruded plastic would still calculated for a .55mm wall.
I will look into this over the next day or so, but I wanted to throw up my theory to see if any one else has experienced something like that, or if it sounds like I'm on the right track. Maybe I'm way off.
Any other ideas or suggestions are appreciated.
Thanks!
-Daniel
Re: Printing properly dimensioned parts?
Just to make sure I'm on the same page, when you measure the cube:
Width, you are not including the first layer.
Wall width, each of the walls and at the middle of the wall, (best results just measuring the upper most layers)
As for the squishing, you want a little higher squishing effect on your first layer, it helps adhesion. The more typical problem is having trouble with parts sticking, not sticking too well (although that happens).
Still, you shouldn't get gaps and voids in the trace itself you're settings are right. Double check your extrusion setting in firmware if that's the case (it's the test you do by having the extruder extrude a length of filament, along the lines of 100mm, and the actual amount through the extruder is the exact same.
If you are talking about gaps/void in the infill, if the gaps are not the same on all four sides of your cube, then you likely have a tower alignment problem. It is likely VERY slight but make sure you use a machine square and check your towers on each of the three sides touching the base, and make sure you're squaring them to the melamine base, not the glass plate. Less likely, but similar issues can also arise from unequal arm lengths. You will want to double check your printer radius settings if you correct the towers.
Double check your temperatures as well if you're having issues with a clean trace. If the extrusion temp is too low it may be to much force and cause skipping in the extruder. You can also turn up the current setting to the extruder in your firmware if you need to, or turn it down if the extruder stepper motor is getting hot (I have a fan pointed at mine so it's set higher than most people would have it, I know you're giving me that look Gene!).
The other issue is if your filament is not dry it can cause popping when it comes out the nozzle. There are threads on drying your filament out in various ways on the forum if this is an issue as well. My humidity is under 20% right now and I still get wary about the filament absorbing moisture.
Good luck and hope some of this was helpful!
Re: Printing properly dimensioned parts?
Well,
I've done it again...
Today I spent some time in the shop working with the Rostock.
I checked the towers again with a machinist's square (as best I could without disassembling stuff) and they looked very true.
I installed the new Repetier firmware that John posted a few days back, and I re-calibrated.
I printed off a test cube, and the layer alignment looked the best I've ever achieved! This was with 1mm wall thickness however.
Trying a .55mm wall thickness I encountered the same general problems as I have mentioned earlier in the thread, though I must say even they seemed a little better since upgrading the firmware.
Anyhow, long story short, I got this hair brained idea that I would try to unscrew the nozzle to make sure there wasn't any funny business going on in there. In my attempt, I pulled out the thermistor. It was still working, just needed to be re-RTV'ed. Or so I thought.
After putting the thermistor back in and gooping it up with the RTV I took a look at the whole hotend...I had bent the whole thing trying to unscrew the nozzle! Doh!
Doh!
So now the hotend is in disrepair, the thermistor is hanging out, and I'm further away from a proper .55 wall thickness than ever.
The upside of the whole thing is that I had my eye on the E3D hotend for a while. This looks like as good a time as any to make the switch.
So question for those who have moved to the E3D -- If I buy the Bowden E3D, will I need a special plate to mount it? As my printer is KIA at the moment, it isn't an option to print my own. So if it does require an adapter, does anyone have an idea where to order one? Or would be willing to print and sell me one?
Thanks in advance!
-Daniel
I've done it again...
Today I spent some time in the shop working with the Rostock.
I checked the towers again with a machinist's square (as best I could without disassembling stuff) and they looked very true.
I installed the new Repetier firmware that John posted a few days back, and I re-calibrated.
I printed off a test cube, and the layer alignment looked the best I've ever achieved! This was with 1mm wall thickness however.
Trying a .55mm wall thickness I encountered the same general problems as I have mentioned earlier in the thread, though I must say even they seemed a little better since upgrading the firmware.
Anyhow, long story short, I got this hair brained idea that I would try to unscrew the nozzle to make sure there wasn't any funny business going on in there. In my attempt, I pulled out the thermistor. It was still working, just needed to be re-RTV'ed. Or so I thought.
After putting the thermistor back in and gooping it up with the RTV I took a look at the whole hotend...I had bent the whole thing trying to unscrew the nozzle!
So now the hotend is in disrepair, the thermistor is hanging out, and I'm further away from a proper .55 wall thickness than ever.
The upside of the whole thing is that I had my eye on the E3D hotend for a while. This looks like as good a time as any to make the switch.
So question for those who have moved to the E3D -- If I buy the Bowden E3D, will I need a special plate to mount it? As my printer is KIA at the moment, it isn't an option to print my own. So if it does require an adapter, does anyone have an idea where to order one? Or would be willing to print and sell me one?
Thanks in advance!
-Daniel
Re: Printing properly dimensioned parts?
I had used an older style J-Head mount from TrickLaser, they appear to have refined it a bit since then. I had to increase the diameter a bit on the old style, so maybe the new style doesn't require any tinkering to work with the E3D. Eventually I printed a new mount, but that worked for a long time for me.
If you get an E3D pick up a spare heat break, they are a fairly fragile part that don't stand up to the more heavy handed of us.
(If you got the hand tools) I heat my hotend up if the nozzle is being stubborn. Take care not to catch the nozzle by reflex if you do that. Not that I did it, but it hurts and causes another reflex reaction.
If it's a replaceable part of the hotend, go ahead and get another one and have a spare hotend. You'll be one step closer to the dual-extruder itch, and at the worst you'll have a backup. Actually at the worst you do something like make a new delta printer just because you have the hotend for it.
-
Eaglezsoar

- ULTIMATE 3D JEDI
- Posts: 7159
- Joined: Sun Apr 01, 2012 5:26 pm
Re: Printing properly dimensioned parts?
That one from Trick Laser will not work with a Bowden E3D, he needs the one 626Pilot designed and is on Thingiverse.lordbinky wrote:I had used an older style J-Head mount from TrickLaser, they appear to have refined it a bit since then. I had to increase the diameter a bit on the old style, so maybe the new style doesn't require any tinkering to work with the E3D. Eventually I printed a new mount, but that worked for a long time for me.
If you get an E3D pick up a spare heat break, they are a fairly fragile part that don't stand up to the more heavy handed of us.
(If you got the hand tools) I heat my hotend up if the nozzle is being stubborn. Take care not to catch the nozzle by reflex if you do that. Not that I did it, but it hurts and causes another reflex reaction.
If it's a replaceable part of the hotend, go ahead and get another one and have a spare hotend. You'll be one step closer to the dual-extruder itch, and at the worst you'll have a backup. Actually at the worst you do something like make a new delta printer just because you have the hotend for it.
Re: Printing properly dimensioned parts?
Ah, good to know 
Thank you.
Thank you.
-
bvandiepenbos

- Printmaster!
- Posts: 923
- Joined: Thu Apr 05, 2012 11:25 pm
- Location: Goshen, IN
- Contact:
Re: Printing properly dimensioned parts?
Eaglezsoar wrote:That one from Trick Laser will not work with a Bowden E3D, he needs the one 626Pilot designed and is on Thingiverse.lordbinky wrote:I had used an older style J-Head mount from TrickLaser, they appear to have refined it a bit since then. I had to increase the diameter a bit on the old style, so maybe the new style doesn't require any tinkering to work with the E3D. Eventually I printed a new mount, but that worked for a long time for me.
If you get an E3D pick up a spare heat break, they are a fairly fragile part that don't stand up to the more heavy handed of us.
(If you got the hand tools) I heat my hotend up if the nozzle is being stubborn. Take care not to catch the nozzle by reflex if you do that. Not that I did it, but it hurts and causes another reflex reaction.
If it's a replaceable part of the hotend, go ahead and get another one and have a spare hotend. You'll be one step closer to the dual-extruder itch, and at the worst you'll have a backup. Actually at the worst you do something like make a new delta printer just because you have the hotend for it.
Eaglezsoar,
I have revised our J-Head mount and offer an different top clamp plate so it WILL work with the E3D bowden hotend. I had a few requests and need one for myself. No cost difference, just specify in order notes that you are using the E3D. I have not updated web site yet, but do have it available.
http://www.tricklaser.com/J-Head-Groove ... JHGMNT.htm
~*Brian
~*Brian V.
RostockMAX v2 (Stock)
MAX METAL "ShortyMAX"
MAX METAL Rostock MAX Printer Frame
NEMESIS Air Delta v1 & v2 -Aluminum delta printers
Rostock MAX "KITT" - Tri-Force Frame
GRABER i3 "Slim"
RostockMAX v2 (Stock)
MAX METAL "ShortyMAX"
MAX METAL Rostock MAX Printer Frame
NEMESIS Air Delta v1 & v2 -Aluminum delta printers
Rostock MAX "KITT" - Tri-Force Frame
GRABER i3 "Slim"
Re: Printing properly dimensioned parts?
Thanks to all who replied to my last post.
I've gone ahead and put in an order for both the Bowden E3D and the TrickLaser mounting plate (I put that it was for the E3D in the purchase notes as instructed). As much as this setback is a bummer, I'm looking forward to trying out a new hotend. Originally I wanted to print with polycarbonate anyway! Now I might actually get the chance to give it a go in the future.
Good advice to get a new part for the old hotend as well. I think it was just the PEEK insulator section that got bent?
I'll look into ordering a new one in the coming days.
For now, it's just going to be a waiting game!
I'll update with more info when I get the new hotend installed.
Thanks again everyone!
-Daniel
-
Eaglezsoar
- ULTIMATE 3D JEDI
- Posts: 7159
- Joined: Sun Apr 01, 2012 5:26 pm
Re: Printing properly dimensioned parts?
I don't believe that the Trick Laser mount will work with the Bowden E3D you need this http://www.thingiverse.com/thing:137140RTLdan wrote:Thanks to all who replied to my last post.
I've gone ahead and put in an order for both the Bowden E3D and the TrickLaser mounting plate (I put that it was for the E3D in the purchase notes as instructed). As much as this setback is a bummer, I'm looking forward to trying out a new hotend. Originally I wanted to print with polycarbonate anyway! Now I might actually get the chance to give it a go in the future.
Good advice to get a new part for the old hotend as well. I think it was just the PEEK insulator section that got bent?
I'll look into ordering a new one in the coming days.
For now, it's just going to be a waiting game!
I'll update with more info when I get the new hotend installed.
Thanks again everyone!
-Daniel
It was created by one of our users. Now the problem is how to print one out.

Re: Printing properly dimensioned parts?
Brian just said two messages earlier that he's modified the mount to work with the E3D. As long as you state that when placing an order, which Daniel said he didEaglezsoar wrote:I don't believe that the Trick Laser mount will work with the Bowden E3D you need this http://www.thingiverse.com/thing:137140RTLdan wrote:Thanks to all who replied to my last post.
I've gone ahead and put in an order for both the Bowden E3D and the TrickLaser mounting plate (I put that it was for the E3D in the purchase notes as instructed). As much as this setback is a bummer, I'm looking forward to trying out a new hotend. Originally I wanted to print with polycarbonate anyway! Now I might actually get the chance to give it a go in the future.
Good advice to get a new part for the old hotend as well. I think it was just the PEEK insulator section that got bent?
I'll look into ordering a new one in the coming days.
For now, it's just going to be a waiting game!
I'll update with more info when I get the new hotend installed.
Thanks again everyone!
-Daniel
It was created by one of our users. Now the problem is how to print one out.
-
Eaglezsoar
- ULTIMATE 3D JEDI
- Posts: 7159
- Joined: Sun Apr 01, 2012 5:26 pm
Re: Printing properly dimensioned parts?
-Daniel[/quote]
I don't believe that the Trick Laser mount will work with the Bowden E3D you need this http://www.thingiverse.com/thing:137140
It was created by one of our users. Now the problem is how to print one out.[/quote]
Brian just said two messages earlier that he's modified the mount to work with the E3D. As long as you state that when placing an order, which Daniel said he did[/quote]
E3D yes, E3D Bowden I'm not so sure, Brian if you are reading this will your mount work with the E3D Bowden?
I don't believe that the Trick Laser mount will work with the Bowden E3D you need this http://www.thingiverse.com/thing:137140
It was created by one of our users. Now the problem is how to print one out.[/quote]
Brian just said two messages earlier that he's modified the mount to work with the E3D. As long as you state that when placing an order, which Daniel said he did
E3D yes, E3D Bowden I'm not so sure, Brian if you are reading this will your mount work with the E3D Bowden?
Re: Printing properly dimensioned parts?
Got my Bowden E3D hotend from Filastruder today, which unfortunately is only being sold as a kit right now...so I'll be putting that together over the next day or so while waiting for the tricklaser mounting plate which is also on it's way. Hopefully it will work for the bowden. If not, I'll have to see about modifying it or getting someone to print and sell me one of the plates that will work that Eaglezoar mentioned earlier from Thingiverse.
I'll update as I continue.
Thanks guys!
-Daniel
I'll update as I continue.
Thanks guys!
-Daniel
Re: Printing properly dimensioned parts?
Hi Guys!
I just wanted to keep this thread up to date in case it is useful for anyone else in the future.
I got my E3D v5 Bowden hotend and the Trick Laser J-Mount head (with top plate for E3D Bowden). Brian from Trick Laser also
included the J-Head top mount plate in case I ever decide to use a J-head. Nice touch! Thanks Brian!
Anyhow, my E3D came as a kit from Filastruder. I've built it, and now I'm just trying to figure out how to get it mounted securely to the rostock.
It seems as though I may need to get longer/additional spacers because right now the E3D's fanblock is making it impossible to mount.
I've started a help request thread with picture here: http://forum.seemecnc.com/viewtopic.php ... 183#p30183 to make sure I'm not missing anything.
Will update with results when this thing is operational again.
Thanks!
-Daniel
Re: Printing properly dimensioned parts?
Quick update here:
Got my new E3D all wired up and mounted with some steel spacers I found at the local hardware store. My Rostock Max kit had come with 1" spacers. I determined that a good spacing would be 1 3/4". So I grabbed 3/4" spacers from the hardware store. I also had to get longer screws. The only one's they had at the harware store that matched were 3" long. They work fine, but if you are doing a similar upgrade, 2 1/2" screws would probably look more tidy.
Anyhow ran into yet another roadblock.
During PID tuning for the hotend heater cartridge, the heater cartridge failed. Or at least I'm pretty sure.
RAMBo looks fine so far. Lights come on when I send a command to increase hotend temp, etc..
I'm going to double check nothing went crazy in my wiring...but this would be the second time one of these heater cartridges failed on me during PID tuning. They heat up pretty quick and then just drop temp, unable to heat up again. The first time it happened to me (with the original SeeMe hotend) I could visually see the cartridge looked "burnt out". Haven't yet inspected this new hotend's cartridge up close.
I recall someone saying that these cartridges can be hit or miss in QC. Luckily when my original failed, I bought a 5 pack. So I've got four more on a shelf. Hopefully it was just another weird fluke.
Thanks!
-Daniel