Page 11 of 21
Re: Trick Laser MAX METAL Build
Posted: Fri Sep 25, 2015 7:27 pm
by KAS
lyncos79 wrote:forrie wrote:Have you seen what KAS has done a few posts up?
Yes, but he's not using the little posts and I am using them... Maybe I can give a try but I feel I'll loose height..
Anyway, can I please get a link to that 'fan rack' stl file ? I may give a try.
Thanks
I drew up a quick print to use a specific type of fan. I have it mounted to one of the tabs on the Trick Laser platform.
The zip file contains the .rsdoc used with DesignSpark Mechanical.
That fan can be found:
http://www.mpja.com/5VDC-Mini-CPU-Fan/p ... 2166%20FN/
[img]
http://s4.postimg.org/ytfrhpk4t/20150925_192707.jpg[/img]
Re: Trick Laser MAX METAL Build
Posted: Fri Sep 25, 2015 9:12 pm
by Eaglezsoar
Kas, thanks for the drawings and link to the fan.
Re: Trick Laser MAX METAL Build
Posted: Thu Oct 01, 2015 4:22 pm
by Tincho85
Sorry, but I can't find KAS's original thread.
How are those 5vdc fans working out? Do they have enough power for layer cooling?
If my memory is right, you wanted to used 3 of them on the effector platform.
Re: Trick Laser MAX METAL Build
Posted: Thu Oct 01, 2015 7:05 pm
by KAS
Tincho85 wrote:Sorry, but I can't find KAS's original thread.
How are those 5vdc fans working out? Do they have enough power for layer cooling?
If my memory is right, you wanted to used 3 of them on the effector platform.
I'm back to only running one fan on the max metal effector and it's doing just fine. At 100% power (12v) it's a screamer and provides plenty of cooling and almost to much force. For the most part I run it at 50% which measured 6v on the smoothieboard.
When I get around to it, I'll add another one just for a different cooling angle.
Re: Trick Laser MAX METAL Build
Posted: Thu Oct 01, 2015 10:07 pm
by lyncos
KAS: You are running a 5v fan at 12v ?
It seems the link you provided only ship in the US

since i'm in canada it will cost me 30$ for 2 fans...
I would love to find a design for the original Seemecnc original blower (I have 6 of them). This will provide more 'distributed' cooling I think..
Or maybe for a 40x40mm fan (I also have many of them)
Any help is welcome.. but I like KAS design.. just too expensive for me
Re: Trick Laser MAX METAL Build
Posted: Fri Oct 02, 2015 1:04 pm
by KAS
Ouch, that's crazy for the shipping. Maybe searching the part number would give other options?
I run it mainly 6v for layer cooling then it bump it up to 12v during bridges.
It has a mild whine at full power but not that noticeable compared to the SP-750-24 power supply.
Candle test. Turn the volume up to hear it.
[youtube]
http://www.youtube.com/watch?v=dj_7z8ihwzc[/youtube]
Re: Trick Laser MAX METAL Build
Posted: Sun Oct 04, 2015 11:11 pm
by bubbasnow
https://goo.gl/photos/2H31WHnRKfxHJphFA
making progress... this thing is going together very easily.
Re: Trick Laser MAX METAL Build
Posted: Fri Oct 09, 2015 1:09 pm
by plasma
Just wanted to share my final built of Max Metal frame built. I have finally got it to the point where the prints come out as perfect as I can expect from a Delta printer.
The final build list:
- Max Metal frame from Brian at Trick Laser
- Some printed stl files designed by ccavanaugh
- Smoothieboard as a controller
- Heated bed with PEI coating
- 24v variable volt PSU for the heated bed.
- Prometheus v2 Hot end
- Repetier server running on a 8" WinTab
- Autocalibration for Smoothieware from Pilot626
- FSR probe system as a Z probe
- Stepper motors 0.9 on 20 tooth gear
- Geared Stepper motor for direct extrusion
- Effector, Drive Trucks and Magnetic Arms adapted from BerryBot and made by Werner Berry to work on Rostock Max 2 and like printers.
Although every component plays a part in getting a good predictable print, I saw the biggest improvement when I switched to the Werner's magnetic arm solution and a direct drive extruder. Here is a picture of a test I did with Yoda STL from Thingiverse printing at 80mm/s, ABS, sliced with S3D with 0.2 mm layer height.
Wanted to thank everyone I mentioned before, and the community. I learned a lot from this community and the wonderful folks who help share knowledge and their time and effort for people who engage in this great hobby.
Re: Trick Laser MAX METAL Build
Posted: Fri Oct 09, 2015 2:15 pm
by bot
+1 for the berrybot parts! Got some for my build, too.
Re: Trick Laser MAX METAL Build
Posted: Fri Oct 09, 2015 2:33 pm
by bvandiepenbos
plasma that is a beautiful build. Prints look amazing.
Werner makes really nice stuff.
Have the magnets ever came apart with weight of extruder on platform?
Do you feel comfortable running it unattended overnight?
Re: Trick Laser MAX METAL Build
Posted: Fri Oct 09, 2015 3:58 pm
by plasma
bvandiepenbos wrote:plasma that is a beautiful build. Prints look amazing.
Werner makes really nice stuff.
Have the magnets ever came apart with weight of extruder on platform?
Do you feel comfortable running it unattended overnight?
Hi Brian,
I've been running this build for about a month and a half. Testing at different speeds and accelerations just to see if the Magnets will give up. So far no problems what so ever. Werner uses putty epoxy instead of JB-weld and all the parts sandblasted for additional bond strength, that seems to work very well.
I run the printer overnight yes.
Re: Trick Laser MAX METAL Build
Posted: Fri Oct 09, 2015 5:53 pm
by forrie
Can you go into more detail on how you mounted the FSR's? It looks like you have the bed mounted at three points on each of the horizontal frame parts?
Does the truck move ok with that tablet wire jammed in the slot like that? What's that Hunter pole dohicky hanging off the extruder?
Re: Trick Laser MAX METAL Build
Posted: Fri Oct 09, 2015 6:36 pm
by plasma
forrie wrote:Can you go into more detail on how you mounted the FSR's? It looks like you have the bed mounted at three points on each of the horizontal frame parts?
Does the truck move ok with that tablet wire jammed in the slot like that? What's that Hunter pole dohicky hanging odd the extruder?
I'll take some pictures of the FSR mounts when I get home. Wire is not an issue there is a lot of room in the slot for the wire to sit in. I park my hot end at the end of the print on that "Hunter pole dohicky" so that when I print un attendant I know that the hot end is secure at the end of each print.
Re: Trick Laser MAX METAL Build
Posted: Fri Oct 09, 2015 9:58 pm
by 626Pilot
Clean build. Very nice.
Re: Trick Laser MAX METAL Build
Posted: Fri Oct 09, 2015 10:21 pm
by plasma
Re: Trick Laser MAX METAL Build
Posted: Sat Oct 10, 2015 2:18 am
by forrie
plasma wrote:Hot Bed mount with FSR.
DSCN0253.JPG
Cool. The mounts don't look printed. What did you use?
Re: Trick Laser MAX METAL Build
Posted: Sat Oct 10, 2015 7:11 am
by plasma
I had some brass rod stock, so I lathed the parts as a barrel and a piston.
Re: Trick Laser MAX METAL Build
Posted: Sat Oct 10, 2015 11:51 am
by RMLynch
I machined mine as well. I used 6061 with very tight tolerances on the "piston" and "bore" and had them black anodized to prevent oxidation and add surface protection. I almost used bronze but wanted them to blend with the black of the machine.

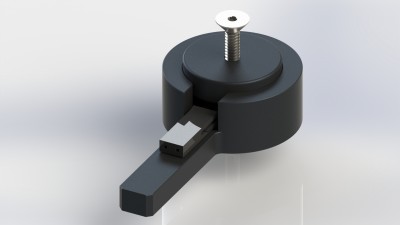
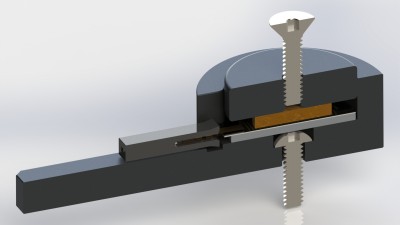
- Rostock MAX v2 - FSR Mount - with Puck - 01

- Rostock MAX v2 - FSR Mount - with Puck - 02

- Rostock MAX v2 - FSR Mounts - with Pucks - 01
Curious though... I can't find those machined parts on Werner's website. How/where did you get them for the Rostock MAX v2? I was emailing back and forth with him for a little while and he mentioned that he was working on these parts for the Rostock MAX v2 months ago but never heard from him again. Glad to see them finally available, although a little late for me as I went with Brian's all METAL Max Platform, Geared Stepper Motor hanging from a "Fly-n-Strude", Trick Trucks & 300mm Carbon Fiber Rods.
Agreed, your build looks very clean! Considering it's a "naked" type of frame... Very nice!
PROStock Ultimate v2
Re: Trick Laser MAX METAL Build
Posted: Sat Oct 10, 2015 6:48 pm
by forrie
plasma wrote:I had some brass rod stock, so I lathed the parts as a barrel and a piston.
Seems like the way to go. I've tried the printed ones, but they bind up ever so slightly. If you sand them or acetone vapour treat them to get them smooth they get a little wobbly.
Re: Trick Laser MAX METAL Build
Posted: Fri Nov 06, 2015 8:19 pm
by Eaglezsoar
bot wrote:+1 for the berrybot parts! Got some for my build, too.
Where can the berrybot parts be purchased?
Re: Trick Laser MAX METAL Build
Posted: Fri Nov 06, 2015 8:28 pm
by KAS
Eaglezsoar wrote:bot wrote:+1 for the berrybot parts! Got some for my build, too.
Where can the berrybot parts be purchased?
http://www.shopspt.com/category-s/102.htm
Re: Trick Laser MAX METAL Build
Posted: Sat Nov 07, 2015 3:33 pm
by Eaglezsoar
Re: Trick Laser MAX METAL Build
Posted: Mon Nov 23, 2015 10:49 pm
by DarrenAnton
ZakRabbit wrote:This seems to be the repository for the Metal Max kit, so with many thanks to Brian for posting his files earlier, I will add these for those who wish to use them as they may. I'm planning on machining it out of aluminum as I work in a CNC machine shop.
hey ZakRabbit are you selling them also? How much to make one for me out of aluminum?
Re: Trick Laser MAX METAL Build
Posted: Tue Nov 24, 2015 12:07 pm
by Aflac
plasma wrote:bvandiepenbos wrote:plasma that is a beautiful build. Prints look amazing.
Werner makes really nice stuff.
Have the magnets ever came apart with weight of extruder on platform?
Do you feel comfortable running it unattended overnight?
Hi Brian,
I've been running this build for about a month and a half. Testing at different speeds and accelerations just to see if the Magnets will give up. So far no problems what so ever. Werner uses putty epoxy instead of JB-weld and all the parts sandblasted for additional bond strength, that seems to work very well.
I run the printer overnight yes.
Is it possible to attach a diamond hotend to that platform?
It doesn't look like it would be easy to do. If not is it possible to attach the magnets to the trick laser metal platform? It would be nice to have two different platforms that could be changed easily. One with a single extruder with the berry extruder, and one with a diamond hotend.
Re: Trick Laser MAX METAL Build
Posted: Tue Nov 24, 2015 5:27 pm
by ZakRabbit
DarrenAnton wrote:ZakRabbit wrote:This seems to be the repository for the Metal Max kit, so with many thanks to Brian for posting his files earlier, I will add these for those who wish to use them as they may. I'm planning on machining it out of aluminum as I work in a CNC machine shop.
hey ZakRabbit are you selling them also? How much to make one for me out of aluminum?
Unfortunately, I have yet to get on a machine long enough to cut any. Just for giggles I had an online place quote it, they came up with about $1100 for two pieces. I'm in the wrong business.