Hello!
I have recently completed my Rostock Max V2 build (you can see it in the build section, here: http://forum.seemecnc.com/viewtopic.php?f=42&t=8889" onclick="window.open(this.href);return false;).
I followed all of the instructions, calibrations, and setup's to the "T". I have been able to print a layer fan out of ABS. Yet, everything else has failed. Initially, my failures were specifically about sticking to the platform. I went through and did some various small, small item printing along with temperature and sticky glass material stuff - until I found a good mix (68o Celsius for PLA Bed Temp + Elmers Purple stick glue). This makes the PLA stick wonderfully.
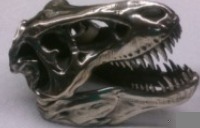
Anyhow - before I swapped over to the PLA (mostly due to the smell) - I tried to print a reduced size T-REX jaw. It looked like it was going great - and made it 3/4 an inch upwards in layer height. When I went to go check on it, I found it in a big ball of black twine mess everywhere. I think what occurred was one of the jaw pieces came unstuck from the heating bed/glue and the fail occurred from there. When I looked at the mess, one jaw side was still stuck, the other was not.
This ultimately made me change to PLA as I couldn't stand the smell this evening. I did an extruder test from dodadsdoes (https://www.youtube.com/watch?v=a1vH3ge-V3Q" onclick="window.open(this.href);return false;) and printed successfully their little stair item. During which, I changed the filament amounts until I was happy with 95%-100%. It was a good test, along with me also running the temp/sticky material test at that time as well. I tried different heat settings, hairspray, tape, etc. As mentioned, for PLA, I am happy with 68o C and Elmers stick glue. Works awesome.
So.. I decided to print an Elephant for my daughter. A few test pieces stuck like a charm, things were looking great - so why not go for something fun? A few hours into the print - things were working great. I tried a .2 layer height, 0% infill (per instructions), and a .95% extrusion multiplier. I just went to check on it - and a big ball of mess is down there. Yet, the print was still stuck to the bed. How can that occur? If nothing unstuck - why would a mess occur?
[img]https://farm6.staticflickr.com/5825/212 ... 7801_c.jpg[/img]
and the other:
[img]https://farm1.staticflickr.com/700/2125 ... 7de7_c.jpg[/img]
What would cause a mid-print explosion, when none of the base pieces came unstuck?
Thanks,
Mike
Yet to successfully print an item of real intent
Re: Yet to successfully print an item of real intent
OK - I just found one setting that was incorrect on my print. On the Extruder 1 Nozzle Diameter field, under the Printer/Extruder setting - it was on .5. Since I have the Prometheus - it came with a .4 nozzle and should have been set accordingly. I had it set in one of the other settings correctly, but when trying to make this "nicer" with a .2 layer height, I must have selected a different profile.
Would this cause the hairball mess that occurred? If so - how was it able to print 38% before the explosion?
Thank you,
Mike
Would this cause the hairball mess that occurred? If so - how was it able to print 38% before the explosion?
Thank you,
Mike
Re: Yet to successfully print an item of real intent
After reading some of the other threads, I increased the ZLIFT parameter from .3mm to 1mm. I will retry the print, but if anyone else has any ideas - please let me know.
Thanks,
Mike
Thanks,
Mike
Re: Yet to successfully print an item of real intent
I sat and watched the print go until 11%. Considering this will be a 6 hour print, I sat there a long time! I almost fell asleep into the print area (head nodded onto the bed).
From what I can tell, it might fail again. The reason may be cooling. The piece has two parallel sides; like this:
-----
-----
Watching the Y axis (forward and backwards from the front) - the back side layer is either curling or not settling correctly as the back sits higher than the front. It is actually a 45o overhang, where the part that contacts the glass bed is 45o inwards to the middle of the piece. Yet, since it sits higher than the rest of the entire model (it is really the back, right side) - I am betting during movement it was hit by the nozzle or fan? Maybe raising the ZLIFT to 1mm - it will allow the part to print.
A few other observations:
- The fan is mounted to the Y effector plate fan mount on the BOTTOM. Therefore, when the plate moves to the top outline to print, it is also cooling straight down over the bottom parts that were just printed. The top half of the model never gets that coverage, due to the fan being mounted on the bottom tab of the Y effector plate.
- The layers are much smoother looking, yet sharper and on point on the bottom layer, whereas the top layer wall looks sloppy.
Based on the inconsistent geometry printing differences (back away from the front of the printer has worse printing detail than the front), and the fan only goes directly over the bottom half of the printed part (the nose points at the nozzle, but those parts never get the additional fan air flow like the bottom ones do, based on the mechanical design and installation), I think there is a correlation here.
Would anyone else agree, or am I just reaching here?
Thanks,
Mike
-
lightninjay

- Printmaster!
- Posts: 289
- Joined: Sun Jul 13, 2014 12:49 am
- Location: Tampa, Florida
Re: Yet to successfully print an item of real intent
I would not personally print it with 0% infill, as I successfully printed one of these elephants for my mom with about 20% infill. Sometimes the infill gives the rest of the part time to properly cool, so if you think this may be a cooling issue, try adding some infill and see if that helps.
If at first you don't succeed, you're doing something wrong. Try again, and if it fails again, try once more. Through trial and error, one can be the first to accomplish something great.
Re: Yet to successfully print an item of real intent
Thank you for the sugestion. When I had 20% Infill in there originally, when I clicked in the 3d preview to see the individual layers (it gives you the stats for the printing (time, fillament usage amount, etc.), it had told me there would be a 150 hour print job. Taking infill back to 0, it dropped it to a 3 hour print.lightninjay wrote:I would not personally print it with 0% infill, as I successfully printed one of these elephants for my mom with about 20% infill. Sometimes the infill gives the rest of the part time to properly cool, so if you think this may be a cooling issue, try adding some infill and see if that helps.
???
Well, it failed again last night.
This time, the Bowden tube came out of the top of the Prometheus Hot End. So instead of a twine spool of a mess, I had a hard spool of filament everywhere, entangling the delta arms. The interesting note on this was, I had specifically pushed the rubber o-ring to the bottom of the Bowden tube where it meet f=and contacts the Hot End, right before the print run. I did this, because I had removed the tube to clear a jam I had from the last explosion. I will take a picture of it and post it up.
The unfortunate part is that the print was successful until that point.
Ugh!
Thanks,
Mike
-
bvandiepenbos

- Printmaster!
- Posts: 927
- Joined: Thu Apr 05, 2012 11:25 pm
- Location: Goshen, IN
- Contact:
Re: Yet to successfully print an item of real intent
Sorry to see your having trouble, it can be frustrating!
The rubber o-ring on bowden tube is meant to aid in releasing the tube collet, it does not hold tube in place.
So if you pressed down on it you would have released or loosened bowden, that is why it popped out.
Make sure bowden is pushed all the way down into heat sink up against the nozzle/heatbreak. And while pushing down, lift up on collet lock ring to take out as much play as possible. It is hard to get to, a small pick with hook on end helps. Or make one from a paperclip.
PLA will work better with 3 cooling fans on platform.
What temperature are you printing the PLA? you want as low as possible and still extrude easily.
I suggest going through MHackneys excellent guide to PLA printing, you can find it on this forum.
here it is http://forum.seemecnc.com/viewtopic.php?f=36&t=7361" onclick="window.open(this.href);return false;
~*Brian V.
RostockMAX v2 (Stock)
MAX METAL "ShortyMAX"
MAX METAL Rostock MAX Printer Frame
NEMESIS Air Delta v1 & v2 -Aluminum delta printers
Rostock MAX "KITT" - Tri-Force Frame
GRABER i3 "Slim"
RostockMAX v2 (Stock)
MAX METAL "ShortyMAX"
MAX METAL Rostock MAX Printer Frame
NEMESIS Air Delta v1 & v2 -Aluminum delta printers
Rostock MAX "KITT" - Tri-Force Frame
GRABER i3 "Slim"
Re: Yet to successfully print an item of real intent
That paperclip hook trick is one of the best ideas I've heard for seating a bowden tube. Definitely doing that next time instead of using a screwdriver.
*not actually a robot
Re: Yet to successfully print an item of real intent
Hi. Mike 
http://www.youtube.com/user/aonemarine" onclick="window.open(this.href);return false;
Lost pla castings? see me
Lost pla castings? see me
Re: Yet to successfully print an item of real intent
Thanks for the link and conversation Dave.bvandiepenbos wrote:Sorry to see your having trouble, it can be frustrating!
The rubber o-ring on bowden tube is meant to aid in releasing the tube collet, it does not hold tube in place.
So if you pressed down on it you would have released or loosened bowden, that is why it popped out.
Make sure bowden is pushed all the way down into heat sink up against the nozzle/heatbreak. And while pushing down, lift up on collet lock ring to take out as much play as possible. It is hard to get to, a small pick with hook on end helps. Or make one from a paperclip.
PLA will work better with 3 cooling fans on platform.
What temperature are you printing the PLA? you want as low as possible and still extrude easily.
I suggest going through MHackneys excellent guide to PLA printing, you can find it on this forum.
here it is http://forum.seemecnc.com/viewtopic.php?f=36&t=7361" onclick="window.open(this.href);return false;
After we spoke and made those changes, I went to print a small object ( a little test object) just to see how the changes went. Then - I was going to follow the process in that video link. Unfortunately, the test print didn't even make the outline skirt before the nozzle jammed again. Once again, the Bowden tube had been pushed out of the Hot End unit (and the rubber ring was not at the base this time). This caused the Filament to spool over the table.
My first attempt (mentioned earlier) - was in ABS - and the part came unstuck from the table - hence causing a ball of twine. I then did the fixes to the table, and sticky stuff as mentioned earlier. I have great success now (I have a difficult time getting the PLA off the table now).
Once I had the table sticking issue fixed, I tried again (mentioned above). Something went wrong, and it did a twine spool again:
[img]https://farm6.staticflickr.com/5825/212 ... 7801_c.jpg[/img]
I cleaned up the nozzle, table, and everything else. I made some printing changes (nozzle size, printing speed, first layer height, etc.). I then decided to print again. Then the Prometheus nozzle jammed and this ocured:
[img]https://farm1.staticflickr.com/706/2109 ... 59b2_c.jpg[/img]
Before the jam, it was printing well. You can see the print on the table, looking good. I then posted this thread, and spoke to Brian. We made multiple software configuration changes. I then cleaned the jam. I used compress air to try to clean the nozzle. At the end, I thought it was pretty clean as I could insert the Filament into the unit and it would freely squeeze out the nozzle. Letting it just sit in there, filament would ooze out at a fairly free/fast pace @ 210 c.
Here was the test print, and it jammed again.
[img]https://farm1.staticflickr.com/572/2125 ... 5023_c.jpg[/img]
I once again cleaned it. I ran more compressed air through the nozzle. I let it sit at 225c, letting it ozze/drip out the nozzle. Once all of plastic dripped out, I turned down the temp to 210c and I ran another set of filament and fed it through the nozzle. It fed cleanly and fed out of the nozzle with little pressure. I then went through the same cleaning process. At the end of the process, no more dripping occurred. Thats where I sit now.
I am going to go through the video Brian recommended. Hopefully that will alleviate any and all jamming; if not - any other ideas?
Thanks,
Mike
Re: Yet to successfully print an item of real intent
Dave - thanks for the conversation we had as well! I will be reaching out to you soon.DavidF wrote:Hi. Mike
Thanks,
Mike
Re: Yet to successfully print an item of real intent
Mike, It was good talking to you tonight. I havent been on here much lately as I have been spending alot of time other forum lately. That and things evolve so fast with the 3d printing that I really cant keep up with it. I hesitate to even comment about what may be going on, but I do have to ask what print speeds you are running at?
http://www.youtube.com/user/aonemarine" onclick="window.open(this.href);return false;
Lost pla castings? see me
Lost pla castings? see me