Page 1 of 21
Trick Laser MAX METAL Build
Posted: Tue Mar 24, 2015 6:29 am
by ccavanaugh
I had seen a posting about the Trick Laser "MAX METAL" frame a couple of weeks ago and was curious.
Long story short, Brian had a frame kit at the MRRF this past weekend and it was love at first sight. The design of the frame is deceptively simple and elegant. It's very rigid and should easily self align and square at assembly for a very accurate build. I have anguished over my own design for while and after seeing the MAX METAL in person, it was a very easy decision... I am now a proud owner of a MAX METAL frame, and the build begins!
Instead of rushing to assemble the frame, I'm slowing down a bit to design up the necessary bits and pieces to perform a parts transplant from from a Rostock MAX v1 kit. Everything is being designed to be printable in a 200mm x 200mm build area. All parts will be printable, but some are designed to be laser cut from MDF as well. Once complete, I will post the parts. I will be using the Trick Laser Trick Trucks for the build, but the original Rostock MAX trucks can be used also.
Design Objectives:
- Reuse as much of the Rostock MAX parts and fasteners as possible. (EZStruder, SeeCNC Hotend, arms, etc)
- Design for the Rambo electronics and the Smoothieboard
- Reuse the stock ATX power supply
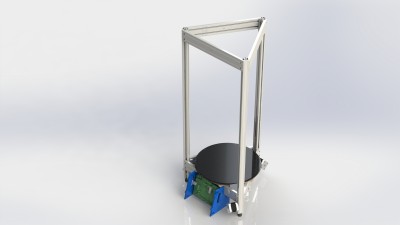
- Full Frame
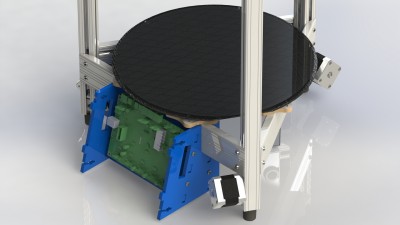
- Electronics Housing
A mashup of the Rambo and Smoothieboard are shown. The extruder wire exit at the bottom.
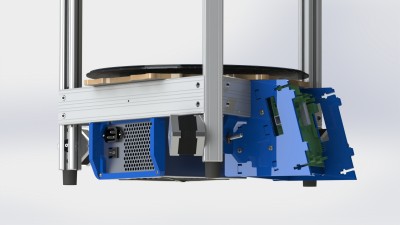
- Power Supply
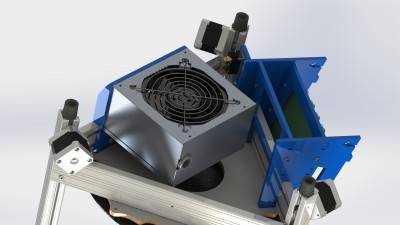
- Under Belly
I'm still roughing out the design. I need a part to secure the Oynx insulator to the frame and need to design end stop switch mounts, etc.
I'm also considering drilling a couple of holes in each vertical extrusion to route the end stop wiring through the center hole.
Trick Laser MAX METAL Build
Posted: Thu Mar 26, 2015 7:08 pm
by ccavanaugh
Switch bracket design complete. It reuses the same Omron switch and fasteners. The t-nuts and screws are reused from the original as well. The Trick Trucks with SeeMe CNC U-Mount are being used.
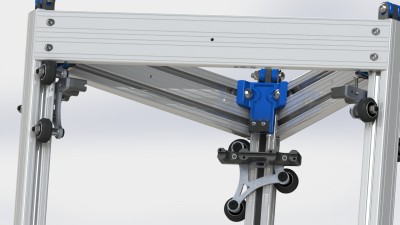
- Switch Bracket and Trick Trucks
I've also designed up an alternate idler assembly that better matches the 20 tooth GT pulley. It uses 2 11mm dia x 4mm thick bearings. The outer sleeves are 3D printable and center the belt with a small amount of clearance. The inner races are clamped tight. A length of heat shrink tubing over the bearings will create a near perfect match. I've been using a similar assembly on a Cartesian printer with very good results.
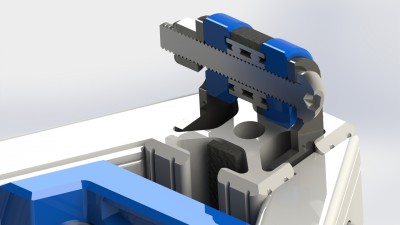
- Idler Cutaway
Trick Laser MAX METAL Build
Posted: Thu Mar 26, 2015 7:27 pm
by ccavanaugh
The heated bed insulator brackets ready to go. Not my favorite, but they should work. The hex pockets for the nylok nuts are sized for a tight fit with use of a soldering planned. I want them to stay put. The bracket is keyed to the 80/20 to prevent rotation and more t-nuts and screws from the original Max V1 are used. The insulator will need to be drilled in order to mount it.
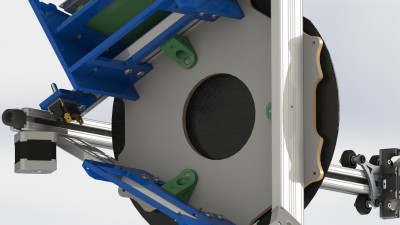
- Heated Bed Insulator Brackets
Re: Trick Laser MAX METAL Build
Posted: Thu Mar 26, 2015 8:01 pm
by forrie
I'm watching this thread with great interest!
If you don't mind me asking how much did you pay for the frame?
Re: Trick Laser MAX METAL Build
Posted: Thu Mar 26, 2015 9:28 pm
by Nylocke
Are you going to enclose it? Build chambers help immensely with ABS and "engineering" plastics like PC and Nylon.
Re: Trick Laser MAX METAL Build
Posted: Thu Mar 26, 2015 9:36 pm
by jmpreuss
I came very close to buying his second frame he made at MRRF, but I realized I would have time to play with it for about 6 months so I figured I would wait for others to cut through the jungle first.
Re: Trick Laser MAX METAL Build
Posted: Thu Mar 26, 2015 9:56 pm
by Glacian22
How much was he selling them for?
Re: Trick Laser MAX METAL Build
Posted: Thu Mar 26, 2015 11:32 pm
by bvandiepenbos
Wow, you have been busy. Nice design, I really like it.
Im am curious why you are not using the open builds idlers I included with the frame?
Re: Trick Laser MAX METAL Build
Posted: Fri Mar 27, 2015 5:32 am
by ccavanaugh
Brian was selling the frame for $300 at the show which is a real bargain if you consider what you get vs. a v2 upgrade kit.
The bonuses with the frame as I see it are
- Rigidity and accuracy
- The motors should run a bit cooler and quieter because they are directly coupled to the aluminum frame
- Ease of assembly
- Stable assembly. My Max v1 lives in an attached garage along with an ORD bot printer. The wood trucks and frame on the Max v1 move a bit in that I have had to adjust the eccentrics periodically while the trucks on the aluminum ORD have not required any adjustments. I heat the garage when needed and it does hit 30F at times when it's very cold. I had sealed my wood pieces with shellac, and I do not think its an issue if the printer is in a climate controlled area.
The reason for having an alternate idler design is simply uncertainty. My gut says that if the belts are not traveling parallel to the motion of the truck, then small positional errors will creep in for large dimensional printed parts. The dimensional error is introduced by changes in angle as the truck approaches the pulley and idler. Because the angle is always changing, this will create some minor dimensional errors in movement because the change in angle is not accounted for in software. Mathematically, I don't think it's much and I may be over thinking it. I've not ruled out the use of the open build idlers, but I'm planning for the worst and hoping for the best. If all I were doing was printing fun things, then I would not worry about it, but I am trying to build a machine that is as accurate as possible. I would also need to print a small spacer between the back of the truck and the belt entry to ensure belt parallelism there also.
I am planning on an enclosure attachment to prevent drafts and stabilize temperatures. It will also make printing in the winter time easier as I will keep my garage at cooler temperatures. I'm trying to keep the frame corners clear to allow for an attachment point.
Re: Trick Laser MAX METAL Build
Posted: Fri Mar 27, 2015 6:09 am
by Glacian22
$300? Damn, that's a friggin' steal!
Re: Trick Laser MAX METAL Build
Posted: Fri Mar 27, 2015 7:23 am
by Mac The Knife
Sign me up!!!
Re: Trick Laser MAX METAL Build
Posted: Fri Mar 27, 2015 12:31 pm
by Eaglezsoar
As more users go this route, the printed files necessary will be posted making it easier for the later adopters to complete the setup.
Not all of us have good cad skills, myself included and the files would be a Godsend to later adopters of the Trick Laser frame.
Re: Trick Laser MAX METAL Build
Posted: Fri Mar 27, 2015 4:45 pm
by bvandiepenbos
I just published the frame on our site. It is now available for purchase. I have raw materials on the way and will be machining frame parts in the next few weeks. The sooner you order the quicker you will get it. I will ship kits as soon as completed to the oldest orders first.
http://www.tricklaser.com/MAX-METAL-Frame-MAXMTLFRM.htm" onclick="window.open(this.href);return false;
Thanks for your positive response already.
A simple precise metal frame is something I have been working on for a year or two and am finally satisfied with the design and reasonable manufacture of the parts. This final design may look simple, but it is deceiving ...simple is good, but simple is HARD.
Re: Trick Laser MAX METAL Build
Posted: Fri Mar 27, 2015 6:31 pm
by Mac The Knife
Well, I just clicked the button.
Is it done yet?
Re: Trick Laser MAX METAL Build
Posted: Fri Mar 27, 2015 7:20 pm
by ccavanaugh
More work on the electronics enclosure today...
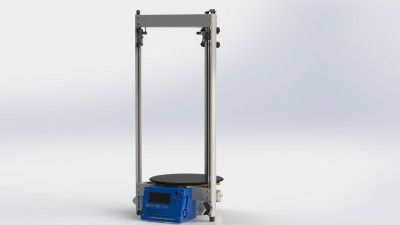
- MAX METAL
The front cover houses the stock Reprap Discount LCD controller.
The top cover is just an interference fit. It should stay put, but will keep dropped parts out of the electronics.
There is room for a 40 mm cooling fan on either side. If using a Rambo, the fan goes on the right. If using a Smoothie, the fan goes on the left. Both boards will require 1/2" spacers. The extra height is to move air around the drivers on the top and bottom sides of the boards. The Smoothie design is based purely on CAD data as I do not currently have one. I use a 40 mm today on the Rambo in the same configuration without issue.
The spacers are printable, but they could be purchased or lathed if desired.
More pictures below...
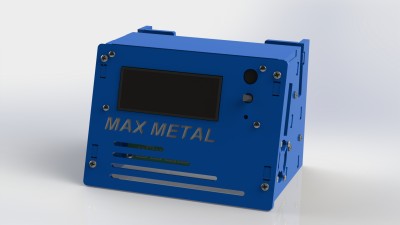
- Enclosure Only
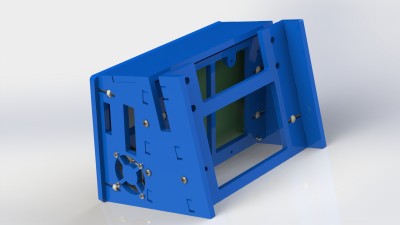
- Back side
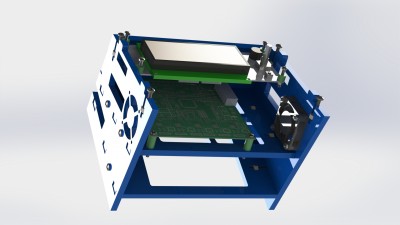
- Cover Removed - Rambo Electronics
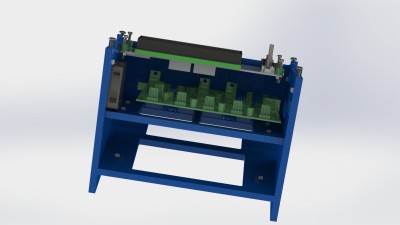
- Smoothie Version
Re: Trick Laser MAX METAL Build
Posted: Fri Mar 27, 2015 8:35 pm
by Mac The Knife
Are the tower locations the same as the SeeMeCNC Max?
Re: Trick Laser MAX METAL Build
Posted: Fri Mar 27, 2015 9:40 pm
by forrie
Mac The Knife wrote:Are the tower locations the same as the SeeMeCNC Max?
I was thinking the same. Slightly taller towers with a bit of over hang and you could reuse the stock base and top pieces.
Re: Trick Laser MAX METAL Build
Posted: Fri Mar 27, 2015 10:47 pm
by KAS
I'm more interested in this being its own printer than cannibalize parts from a v1/v2 to make it work.
I was hoping for a slightly larger footprint than the current Max so we could use longer arms with the same 310mm glass.
When do you plan on have a up and running machine?
Re: Trick Laser MAX METAL Build
Posted: Fri Mar 27, 2015 11:34 pm
by bvandiepenbos
Mac The Knife wrote:Are the tower locations the same as the SeeMeCNC Max?
yes, the tower spacing is the same as the max wood frame. 200 mm radius to center of tower.
Re: Trick Laser MAX METAL Build
Posted: Fri Mar 27, 2015 11:47 pm
by bot
I would LOVE a bigger one, like KAS said.

Re: Trick Laser MAX METAL Build
Posted: Sat Mar 28, 2015 12:19 am
by Jimustanguitar
bot wrote:I would LOVE a bigger one, like KAS said.

The snag is that if you make it wider you'd need longer arms, and if you make it taller you'd need longer belts. I believe that the idea is that you can buy the kit and put the parts that you already have on it.
If you had the above parts figured out, there's no reason that you couldn't do a bigger one though.
Re: Trick Laser MAX METAL Build
Posted: Sat Mar 28, 2015 12:54 am
by bot
Oh I totally want longer arms. I don't need it taller, maybe just a bit to account for the lost height from the length of arm increase. I just mean: pretty please can you machine a version that is a bigger triangle, with a 310mm incircle? Heck, go bigger if it seems practical. I can get 14" round mirrors easily!

Re: Trick Laser MAX METAL Build
Posted: Sat Mar 28, 2015 4:50 am
by forrie
Was all ready to grab one......then saw the shipping to Australia (almost the same as the Frame)...
Oh wells...not this time

Re: Trick Laser MAX METAL Build
Posted: Sat Mar 28, 2015 7:34 am
by ccavanaugh
EZStruder mounting bracket is complete. It uses a couple more 1/4-20 t-nuts and will require a longer screw than stock to mount. It's beefy and should be printable with a sparse infill to keep filament usage to a minimum. I wanted it stiff because the mass of the motor is cantilevered.
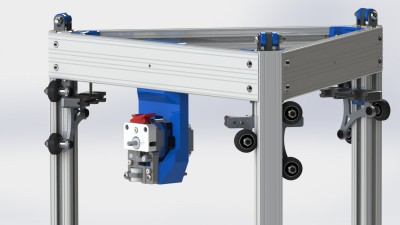
- EZStruder Mount
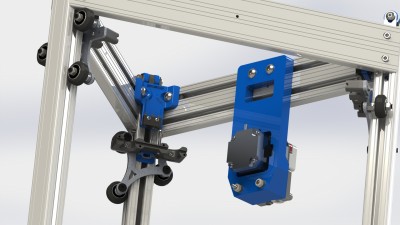
- EZStruder Mount - Backside
An alternate route is to take the original mount and drill out the nut locations and bolt it to the frame using the t-nuts and stock screws.
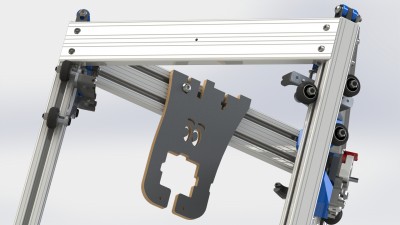
- Alternate mount
Re: Trick Laser MAX METAL Build
Posted: Sat Mar 28, 2015 9:24 am
by Mac The Knife
Brian, What if the X and Y towers were mirrored, that way both motors would hang towards the rear? Is that easily doable?