Dual extruders
Re: Dual extruders
yea i was doing that, i get tons of oozing 
Re: Dual extruders
Thanks for the desing! I have my own copy now; thanks for the tip of screwing it *BEFORE* attaching ... hehehe ... simple, but works!dpmacri wrote:Because of the narrow opening in the stock Rostock MAX platform, I made my dual E3D adaptor place the E3Ds as close together as possible. That way the two bowden connectors actually fit through the platform...barely.I actually screw in the bowden's and align their edges *before* attaching the mount to the platform. It works although I need to make an alteration to my design for adjusting the height of one of the extruders because my 2nd extruder nozzle is a few tenths of a millimeter above the glass when the other one is touching the glass
For anyone interested, here's the link to my mount for 2 E3Ds: http://www.thingiverse.com/thing:217662
Re: Dual extruders
oh, by the way, would you, please, share the X and Y offsets for E0 and E1?dpmacri wrote:Because of the narrow opening in the stock Rostock MAX platform, I made my dual E3D adaptor place the E3Ds as close together as possible. That way the two bowden connectors actually fit through the platform...barely.
For anyone interested, here's the link to my mount for 2 E3Ds: http://www.thingiverse.com/thing:217662
I set mines :
E0 X=-10.83mm Y=6.25
E1 X=10.83, Y=-6.25
Thanks!

Re: Dual extruders
I modified the extruder offsets in the firmware (I was using 0.83 at the time). I used EXT0_X_OFFSET=-1000 and EXT1_X_OFFSET=1000 which basically sets them at -12.5 mm (80 steps/mm) and +12.5 mm.artexmg wrote:oh, by the way, would you, please, share the X and Y offsets for E0 and E1?dpmacri wrote:Because of the narrow opening in the stock Rostock MAX platform, I made my dual E3D adaptor place the E3Ds as close together as possible. That way the two bowden connectors actually fit through the platform...barely.
For anyone interested, here's the link to my mount for 2 E3Ds: http://www.thingiverse.com/thing:217662
I set mines :
E0 X=-10.83mm Y=6.25
E1 X=10.83, Y=-6.25
Thanks!
Re: Dual extruders
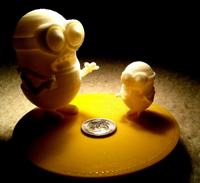
Here is my copy printed and mounted (already properly credited in Thingiverse, of coursedpmacri wrote: For anyone interested, here's the link to my mount for 2 E3Ds: http://www.thingiverse.com/thing:217662
Already had my first two color printing today (2 am !); double extruder is just so amazing!
Re: Dual extruders
Nice! Where did you get the springs and did you put them on all 4 screws?artexmg wrote:Here is my copy printed and mounted (already properly credited in Thingiverse, of coursedpmacri wrote: For anyone interested, here's the link to my mount for 2 E3Ds: http://www.thingiverse.com/thing:217662
As per the alignment problem, I added springs between the platform and the adaptor, so I was able to level the two hot ends easier.
Already had my first two color printing today (2 am !); double extruder is just so amazing!
Re: Dual extruders
I got an assortment box from amazon http://www.amazon.com/Neiko-Steel-Sprin ... y_hi_img_z" onclick="window.open(this.href);return false;dpmacri wrote:Nice! Where did you get the springs and did you put them on all 4 screws?artexmg wrote:Here is my copy printed and mounted (already properly credited in Thingiverse, of coursedpmacri wrote: For anyone interested, here's the link to my mount for 2 E3Ds: http://www.thingiverse.com/thing:217662
As per the alignment problem, I added springs between the platform and the adaptor, so I was able to level the two hot ends easier.
Already had my first two color printing today (2 am !); double extruder is just so amazing!
I put only 3 and worked fine. Maybe with 4 you have more control, but 3 is less screws to adjust. I guess even two should work.
-
grimmindustries

- Printmaster!
- Posts: 46
- Joined: Wed Jan 01, 2014 9:45 pm
- Location: New Orleans, LA
- Contact:
Re: Dual extruders
When I try to verify these files I get the following error "WRITE(PS_ON_PIN, (POWER_INVERTING ? HIGH : LOW)); " "Commands.cpp:770: error: 'POWER_INVERTING' was not declared in this scope"LorenOlepi wrote:Attached you will find my latest configuration and pin file... note that I also changed some other settings like turning off the beep (did it every tool change) and the preheat temps. If you find differences from what was posted please share back with the community so they too can run the duals
Note your offsets may be different depending on how you set yours up In Repetier host go to config --> prninter --> number of extruders = 2
In slic3r endure you have it set to 2 extruders in printer settings and put in your offsets as well
Also here is what I have for my Start G-code in slic3r under printer settings --> custom G-code. This is because if you start switching between t1 and t2 when its homed the height gets messed up and will hit the bed. Having the tool change lower then home will allow it to switch around properly
G28 ; home all axes
G1 Z270 F500 ; brings to a safe zone to switch T0 and T1
Good luck....
s
Any idea what I need to do to fix this?
-
grimmindustries
- Printmaster!
- Posts: 46
- Joined: Wed Jan 01, 2014 9:45 pm
- Location: New Orleans, LA
- Contact:
Re: Dual extruders
Hi Guys,
I used the setting below and when I verified the changes in Repetier I this error.
"while(delta_segment_count + produced_segments>=DELTA_CACHE_SIZE) { // wait for a free entry in movement cache"
motion.cpp: In function 'long int calculate_delta_segments(PrintLine*, byte)':
motion.cpp:890: error: 'MAX_DELTA_SEGMENTS_PER_LINE' was not declared in this scope
motion.cpp:941: error: 'MAX_DELTA_SEGMENTS_PER_LINE' was not declared in this scope
motion.cpp: In function 'void split_delta_move(byte, byte, byte)':
motion.cpp error: 'MAX_DELTA_SEGMENTS_PER_LINE' was not declared in this scope
motion.cpp error: 'MAX_DELTA_SEGMENTS_PER_LINE' was not declared in this scope
Any idea what's wrong?
I used the setting below and when I verified the changes in Repetier I this error.
"while(delta_segment_count + produced_segments>=DELTA_CACHE_SIZE) { // wait for a free entry in movement cache"
motion.cpp: In function 'long int calculate_delta_segments(PrintLine*, byte)':
motion.cpp:890: error: 'MAX_DELTA_SEGMENTS_PER_LINE' was not declared in this scope
motion.cpp:941: error: 'MAX_DELTA_SEGMENTS_PER_LINE' was not declared in this scope
motion.cpp: In function 'void split_delta_move(byte, byte, byte)':
motion.cpp
 error: 'MAX_DELTA_SEGMENTS_PER_LINE' was not declared in this scope
motion.cpp
 error: 'MAX_DELTA_SEGMENTS_PER_LINE' was not declared in this scope
Any idea what's wrong?
bubbasnow wrote:alright i have it wired like this
[img]https://lh3.googleusercontent.com/-F2bO ... 152309.jpg[/img]
i have extruder 1 on heat0, extruder 2 on heat1, bed heat 2
temp 1 on t0, temp 2 on t1, bed t2
i took a fresh seemecnc firmware and modified it as follows
configuration.hpins.hCode: Select all
#define NUM_EXTRUDER 2 //// The following define selects which electronics board you have. Please choose the one that matches your setup // Gen3 PLUS for RepRap Motherboard V1.2 = 21 // MEGA/RAMPS up to 1.2 = 3 // RAMPS 1.3/RAMPS 1.4 = 33 // Azteeg X3 = 34 // Gen6 = 5 // Gen6 deluxe = 51 // Sanguinololu up to 1.1 = 6 // Sanguinololu 1.2 and above = 62 // Melzi board = 63 // Define REPRAPPRO_HUXLEY if you have one for correct HEATER_1_PIN assignment! // Gen7 1.1 till 1.3.x = 7 // Gen7 1.4.1 and later = 71 // Sethi 3D_1 = 72 // Teensylu (at90usb) = 8 // requires Teensyduino // Printrboard (at90usb) = 9 // requires Teensyduino // Foltyn 3D Master = 12 // MegaTronics 1.0 = 70 // Megatronics 2.0 = 701 // RUMBA = 80 // Get it from reprapdiscount // FELIXprinters = 101 // Rambo = 301 // PiBot for Repetier V1.0-1.3= 314 // PiBot for Repetier V1.4 = 315 // Sanguish Beta = 501 #define MOTHERBOARD 301 #include "pins.h" // Override pin definions from pins.h //#define FAN_PIN 4 // Extruder 2 uses the default fan output, so move to an other pin //#define EXTERNALSERIAL use Arduino serial library instead of build in. Requires more ram, has only 63 byte input buffer. // Uncomment the following line if you are using arduino compatible firmware made for Arduino version earlier then 1.0 // If it is incompatible you will get compiler errors about write functions not beeing compatible! //#define COMPAT_PRE1 /* Define the type of axis movements needed for your printer. The typical case is a full cartesian system where x, y and z moves are handled by separate motors. 0 = full cartesian system, xyz have seperate motors. 1 = z axis + xy H-gantry (x_motor = x+y, y_motor = x-y) 2 = z axis + xy H-gantry (x_motor = x+y, y_motor = y-x) 3 = Delta printers (Rostock, Kossel, RostockMax, Cerberus, etc) 4 = Tuga printer (Scott-Russell mechanism) 5 = Bipod system (not implemented) Cases 1 and 2 cover all needed xy H gantry systems. If you get results mirrored etc. you can swap motor connections for x and y. If a motor turns in the wrong direction change INVERT_X_DIR or INVERT_Y_DIR. */ #define DRIVE_SYSTEM 3 // ########################################################################################## // ## Calibration ## // ########################################################################################## /** Drive settings for the Delta printers */ #if DRIVE_SYSTEM==3 // *************************************************** // *** These parameter are only for Delta printers *** // *************************************************** /** \brief Delta drive type: 0 - belts and pulleys, 1 - filament drive */ #define DELTA_DRIVE_TYPE 0 #if DELTA_DRIVE_TYPE == 0 /** \brief Pitch in mm of drive belt. GT2 = 2mm */ #define BELT_PITCH 2 /** \brief Number of teeth on X, Y and Z tower pulleys */ #define PULLEY_TEETH 20 #define PULLEY_CIRCUMFERENCE (BELT_PITCH * PULLEY_TEETH) #elif DELTA_DRIVE_TYPE == 1 /** \brief Filament pulley diameter in milimeters */ #define PULLEY_DIAMETER 10 #define PULLEY_CIRCUMFERENCE (PULLEY_DIAMETER * 3.1415927) #endif /** \brief Steps per rotation of stepper motor */ #define STEPS_PER_ROTATION 200 /** \brief Micro stepping rate of X, Y and Y tower stepper drivers */ #define MICRO_STEPS 16 // Calculations #define AXIS_STEPS_PER_MM ((float)(MICRO_STEPS * STEPS_PER_ROTATION) / PULLEY_CIRCUMFERENCE) #define XAXIS_STEPS_PER_MM AXIS_STEPS_PER_MM #define YAXIS_STEPS_PER_MM AXIS_STEPS_PER_MM #define ZAXIS_STEPS_PER_MM AXIS_STEPS_PER_MM #else // ******************************************************* // *** These parameter are for all other printer types *** // ******************************************************* /** Drive settings for printers with cartesian drive systems */ /** \brief Number of steps for a 1mm move in x direction. For xy gantry use 2*belt moved! Overridden if EEPROM activated. */ #define XAXIS_STEPS_PER_MM 98.425196 /** \brief Number of steps for a 1mm move in y direction. For xy gantry use 2*belt moved! Overridden if EEPROM activated.*/ #define YAXIS_STEPS_PER_MM 98.425196 /** \brief Number of steps for a 1mm move in z direction Overridden if EEPROM activated.*/ #define ZAXIS_STEPS_PER_MM 2560 #endif // ########################################################################################## // ## Extruder configuration ## // ########################################################################################## // for each extruder, fan will stay on until extruder temperature is below this value #define EXTRUDER_FAN_COOL_TEMP 50 #define EXT0_X_OFFSET 0 #define EXT0_Y_OFFSET 0 // for skeinforge 40 and later, steps to pull the plasic 1 mm inside the extruder, not out. Overridden if EEPROM activated. #define EXT0_STEPS_PER_MM 92.4 // EZStruder // What type of sensor is used? // 1 is 100k thermistor (Epcos B57560G0107F000 - RepRap-Fab.org and many other) // 2 is 200k thermistor // 3 is mendel-parts thermistor (EPCOS G550) // 4 is 10k thermistor // 8 is ATC Semitec 104GT-2 // 5 is userdefined thermistor table 0 // 6 is userdefined thermistor table 1 // 7 is userdefined thermistor table 2 // 50 is userdefined thermistor table 0 for PTC thermistors // 51 is userdefined thermistor table 0 for PTC thermistors // 52 is userdefined thermistor table 0 for PTC thermistors // 60 is AD8494, AD8495, AD8496 or AD8497 (5mV/degC and 1/4 the price of AD595 but only MSOT_08 package) // 97 Generic thermistor table 1 // 98 Generic thermistor table 2 // 99 Generic thermistor table 3 // 100 is AD595 // 101 is MAX6675 // 102 is MAX31855 #define EXT0_TEMPSENSOR_TYPE 97 // Analog input pin for reading temperatures or pin enabling SS for MAX6675 #define EXT0_TEMPSENSOR_PIN TEMP_0_PIN // Which pin enables the heater #define EXT0_HEATER_PIN HEATER_0_PIN #define EXT0_STEP_PIN E0_STEP_PIN #define EXT0_DIR_PIN E0_DIR_PIN // set to false/true for normal / inverse direction #define EXT0_INVERSE true #define EXT0_ENABLE_PIN E0_ENABLE_PIN // For Inverting Stepper Enable Pins (Active Low) use 0, Non Inverting (Active High) use 1 #define EXT0_ENABLE_ON false // The following speed settings are for skeinforge 40+ where e is the // length of filament pulled inside the heater. For repsnap or older // skeinforge use higher values. // Overridden if EEPROM activated. #define EXT0_MAX_FEEDRATE 100 // Feedrate from halted extruder in mm/s // Overridden if EEPROM activated. #define EXT0_MAX_START_FEEDRATE 45 // Acceleration in mm/s^2 // Overridden if EEPROM activated. #define EXT0_MAX_ACCELERATION 6500 /** Type of heat manager for this extruder. - 0 = Simply switch on/off if temperature is reached. Works always. - 1 = PID Temperature control. Is better but needs good PID values. Defaults are a good start for most extruder. - 3 = Dead-time control. PID_P becomes dead-time in seconds. Overridden if EEPROM activated. */ #define EXT0_HEAT_MANAGER 1 /** Wait x seconds, after reaching target temperature. Only used for M109. Overridden if EEPROM activated. */ #define EXT0_WATCHPERIOD 3 /** \brief The maximum value, I-gain can contribute to the output. A good value is slightly higher then the output needed for your temperature. Values for starts: 130 => PLA for temperatures from 170-180 deg C 180 => ABS for temperatures around 240 deg C The precise values may differ for different nozzle/resistor combination. Overridden if EEPROM activated. */ #define EXT0_PID_INTEGRAL_DRIVE_MAX 205 /** \brief lower value for integral part The I state should converge to the exact heater output needed for the target temperature. To prevent a long deviation from the target zone, this value limits the lower value. A good start is 30 lower then the optimal value. You need to leave room for cooling. Overridden if EEPROM activated. */ #define EXT0_PID_INTEGRAL_DRIVE_MIN 60 /** P-gain. Overridden if EEPROM activated. */ #define EXT0_PID_P 31.36 /** I-gain. Overridden if EEPROM activated. */ #define EXT0_PID_I 2.18 /** Dgain. Overridden if EEPROM activated.*/ #define EXT0_PID_D 112.90 // maximum time the heater is can be switched on. Max = 255. Overridden if EEPROM activated. #define EXT0_PID_MAX 255 /** \brief Faktor for the advance algorithm. 0 disables the algorithm. Overridden if EEPROM activated. K is the factor for the quadratic term, which is normally disabled in newer versions. If you want to use the quadratic factor make sure ENABLE_QUADRATIC_ADVANCE is defined. L is the linear factor and seems to be working better then the quadratic dependency. */ #define EXT0_ADVANCE_K 0.0f #define EXT0_ADVANCE_L 0.0f /* Motor steps to remove backlash for advance alorithm. These are the steps needed to move the motor cog in reverse direction until it hits the driving cog. Direct drive extruder need 0. */ #define EXT0_ADVANCE_BACKLASH_STEPS 0 /** \brief Temperature to retract filament when extruder is heating up. Overridden if EEPROM activated. */ #define EXT0_WAIT_RETRACT_TEMP 150 /** \brief Units (mm/inches) to retract filament when extruder is heating up. Overridden if EEPROM activated. Set to 0 to disable. */ #define EXT0_WAIT_RETRACT_UNITS 0 /** You can run any gcode command on extruder deselect/select. Seperate multiple commands with a new line \n. That way you can execute some mechanical components needed for extruder selection or retract filament or whatever you need. The codes are only executed for multiple extruder when changing the extruder. */ #define EXT0_SELECT_COMMANDS "M117 Extruder 1" #define EXT0_DESELECT_COMMANDS "" /** The extruder cooler is a fan to cool the extruder when it is heating. If you turn the etxruder on, the fan goes on. */ #define EXT0_EXTRUDER_COOLER_PIN 8 /** PWM speed for the cooler fan. 0=off 255=full speed */ #define EXT0_EXTRUDER_COOLER_SPEED 255 // =========================== Configuration for second extruder ======================== #define EXT1_X_OFFSET 10 #define EXT1_Y_OFFSET 0 // for skeinforge 40 and later, steps to pull the plasic 1 mm inside the extruder, not out. Overridden if EEPROM activated. #define EXT1_STEPS_PER_MM 92.4 // What type of sensor is used? // 1 is 100k thermistor (Epcos B57560G0107F000 - RepRap-Fab.org and many other) // 2 is 200k thermistor // 3 is mendel-parts thermistor (EPCOS G550) // 4 is 10k thermistor // 5 is userdefined thermistor table 0 // 6 is userdefined thermistor table 1 // 7 is userdefined thermistor table 2 // 8 is ATC Semitec 104GT-2 // 50 is userdefined thermistor table 0 for PTC thermistors // 51 is userdefined thermistor table 0 for PTC thermistors // 52 is userdefined thermistor table 0 for PTC thermistors // 60 is AD8494, AD8495, AD8496 or AD8497 (5mV/degC and 1/4 the price of AD595 but only MSOT_08 package) // 97 Generic thermistor table 1 // 98 Generic thermistor table 2 // 99 Generic thermistor table 3 // 100 is AD595 // 101 is MAX6675 #define EXT1_TEMPSENSOR_TYPE 97 // Analog input pin for reading temperatures or pin enabling SS for MAX6675 #define EXT1_TEMPSENSOR_PIN TEMP_2_PIN // Which pin enables the heater #define EXT1_HEATER_PIN HEATER_2_PIN #define EXT1_STEP_PIN E1_STEP_PIN #define EXT1_DIR_PIN E1_DIR_PIN // set to 0/1 for normal / inverse direction #define EXT1_INVERSE true #define EXT1_ENABLE_PIN E1_ENABLE_PIN // For Inverting Stepper Enable Pins (Active Low) use 0, Non Inverting (Active High) use 1 #define EXT1_ENABLE_ON false // The following speed settings are for skeinforge 40+ where e is the // length of filament pulled inside the heater. For repsnap or older // skeinforge use heigher values. // Overridden if EEPROM activated. #define EXT1_MAX_FEEDRATE 100 // Feedrate from halted extruder in mm/s // Overridden if EEPROM activated. #define EXT1_MAX_START_FEEDRATE 45 // Acceleration in mm/s^2 // Overridden if EEPROM activated. #define EXT1_MAX_ACCELERATION 6500 /** Type of heat manager for this extruder. - 0 = Simply switch on/off if temperature is reached. Works always. - 1 = PID Temperature control. Is better but needs good PID values. Defaults are a good start for most extruder. Overridden if EEPROM activated. */ #define EXT1_HEAT_MANAGER 1 /** Wait x seconds, after reaching target temperature. Only used for M109. Overridden if EEPROM activated. */ #define EXT1_WATCHPERIOD 1 /** \brief The maximum value, I-gain can contribute to the output. A good value is slightly higher then the output needed for your temperature. Values for starts: 130 => PLA for temperatures from 170-180 deg C 180 => ABS for temperatures around 240 deg C The precise values may differ for different nozzle/resistor combination. Overridden if EEPROM activated. */ #define EXT1_PID_INTEGRAL_DRIVE_MAX 205 /** \brief lower value for integral part The I state should converge to the exact heater output needed for the target temperature. To prevent a long deviation from the target zone, this value limits the lower value. A good start is 30 lower then the optimal value. You need to leave room for cooling. Overridden if EEPROM activated. */ #define EXT1_PID_INTEGRAL_DRIVE_MIN 60 /** P-gain. Overridden if EEPROM activated. */ #define EXT1_PID_P 31.36 /** I-gain. Overridden if EEPROM activated. */ #define EXT1_PID_I 2.38 /** D-gain. Overridden if EEPROM activated.*/ #define EXT1_PID_D 112.9 // maximum time the heater is can be switched on. Max = 255. Overridden if EEPROM activated. #define EXT1_PID_MAX 255 /** \brief Faktor for the advance algorithm. 0 disables the algorithm. Overridden if EEPROM activated. K is the factor for the quadratic term, which is normally disabled in newer versions. If you want to use the quadratic factor make sure ENABLE_QUADRATIC_ADVANCE is defined. L is the linear factor and seems to be working better then the quadratic dependency. */ #define EXT1_ADVANCE_K 0.0f #define EXT1_ADVANCE_L 0.0f /* Motor steps to remove backlash for advance alorithm. These are the steps needed to move the motor cog in reverse direction until it hits the driving cog. Direct drive extruder need 0. */ #define EXT1_ADVANCE_BACKLASH_STEPS 0 #define EXT1_WAIT_RETRACT_TEMP 150 #define EXT1_WAIT_RETRACT_UNITS 0 #define EXT1_SELECT_COMMANDS "M117 Extruder 2" #define EXT1_DESELECT_COMMANDS "" /** The extruder cooler is a fan to cool the extruder when it is heating. If you turn the etxruder on, the fan goes on. */ #define EXT1_EXTRUDER_COOLER_PIN -1 /** PWM speed for the cooler fan. 0=off 255=full speed */ #define EXT1_EXTRUDER_COOLER_SPEED 255 /** If enabled you can select the distance your filament gets retracted during a M140 command, after a given temperature is reached. */ #define RETRACT_DURING_HEATUP truenote in the configuration.h i changedCode: Select all
#define HEATER_BED_PIN 3
#define TEMP_BED_PIN   2

#define HEATER_0_PIN   9
#define TEMP_0_PIN     0

#define HEATER_1_PIN   3
#define TEMP_1_PIN     2

#define HEATER_2_PIN   7
#define TEMP_2_PIN     1
from default 7 -> 8 because it was stopping extuder 2 from heating.. heater_2_pin was also 7 so i think there is a conflict.Code: Select all
#define EXT0_EXTRUDER_COOLER_PIN 8
make sure the drive is enabled in configure.h alsothen i connected RH and setup the printer with 2 extruders, and updated the eeprom and made both extruders the same.Code: Select all
#define MOTOR_CURRENT {175,175,175,200,200}
now i can control them all
Re: Dual extruders
That Configuration.h file appears to be missing things. I'm not sure why -- BubbaSnow will have to answer that 
-
Eaglezsoar

- ULTIMATE 3D JEDI
- Posts: 7185
- Joined: Sun Apr 01, 2012 5:26 pm
Re: Dual extruders
Wow, thanks for posting your config. That should help people implementing what you did.
With the kind of info you are posting it would be difficult to fail.
With the kind of info you are posting it would be difficult to fail.
Re: Dual extruders
What FW are you running?grimmindustries wrote:Hi Guys,
I used the setting below and when I verified the changes in Repetier I this error.
"while(delta_segment_count + produced_segments>=DELTA_CACHE_SIZE) { // wait for a free entry in movement cache"
motion.cpp: In function 'long int calculate_delta_segments(PrintLine*, byte)':
motion.cpp:890: error: 'MAX_DELTA_SEGMENTS_PER_LINE' was not declared in this scope
motion.cpp:941: error: 'MAX_DELTA_SEGMENTS_PER_LINE' was not declared in this scope
motion.cpp: In function 'void split_delta_move(byte, byte, byte)':
motion.cpp
motion.cpp
Any idea what's wrong?
-
grimmindustries
- Printmaster!
- Posts: 46
- Joined: Wed Jan 01, 2014 9:45 pm
- Location: New Orleans, LA
- Contact:
Re: Dual extruders
Repetier-Arduino 1.0.5
I've only loaded a few setting at a time and have avoided the error so far, but when I turn on my RostockMax the temps read correctly on the printers screen, when I connect from my laptop the second extruder jumps to 70 degrees even though it's not on. I am also having a problem with the cold extruder, no matter how many mm I set it to extrude the motor just keeps turning until I turn off the printer.
I've only loaded a few setting at a time and have avoided the error so far, but when I turn on my RostockMax the temps read correctly on the printers screen, when I connect from my laptop the second extruder jumps to 70 degrees even though it's not on. I am also having a problem with the cold extruder, no matter how many mm I set it to extrude the motor just keeps turning until I turn off the printer.
Re: Dual extruders
Sorry i ment what Firmware is your RAMBo on?grimmindustries wrote:Repetier-Arduino 1.0.5
-
grimmindustries
- Printmaster!
- Posts: 46
- Joined: Wed Jan 01, 2014 9:45 pm
- Location: New Orleans, LA
- Contact:
Re: Dual extruders
0.83 I believe.
Re: Dual extruders
those settings are valid only for .91 your going to have to upgrade if you want to use them as isgrimmindustries wrote:0.83 I believe.
-
grimmindustries
- Printmaster!
- Posts: 46
- Joined: Wed Jan 01, 2014 9:45 pm
- Location: New Orleans, LA
- Contact:
Re: Dual extruders
Thanks, I'll try updating it.
-
grimmindustries
- Printmaster!
- Posts: 46
- Joined: Wed Jan 01, 2014 9:45 pm
- Location: New Orleans, LA
- Contact:
Re: Dual extruders
How did you get the firmware update?
bubbasnow wrote:those settings are valid only for .91 your going to have to upgrade if you want to use them as isgrimmindustries wrote:0.83 I believe.
-
grimmindustries
- Printmaster!
- Posts: 46
- Joined: Wed Jan 01, 2014 9:45 pm
- Location: New Orleans, LA
- Contact:
Re: Dual extruders
Never mind I realize that was a very stupid question.
Re: Dual extruders
Hi Guys, just successfully duel printed with my Kraken! No issues, well except for length of retraction I still have to adjust - I have volcano kraken hybrid! With the default calibration block in MatterControl it would normally take 35 min with the standard setting with a .3mm nozzle and the Volcano reduced that to 10 minutes with a .6mm layer height.
If anyone wants to use their duel printing for color and not just support I discovered that you would have to edit/duplicate your mattercontrol material and assign it to material 2, and in the slice presets editor add general>support material>support material extruder (set to 2)
Then add general>support material>support interface extruder (set to 2) <-- I'm not sure if this line needs to be added to the editor but it works fine anyways. You can set your single temp in here for your second extruder.
I wish there was a more thorough guide on matter control wiki for color/support material printing - here is a link with the limited Matter Control instructions http://wiki.mattercontrol.com/Multi_Extrusion
In repetier firmware I've enabled ditto printing but I haven't discovered how to extrude on the same model at the same time.. has anyone else made this feature work?