crocky's Rostock Max V2 Build

Start your own build thread so others can see how it's going, and even help out!
User avatar
crocky
Printmaster!
Posts: 270
Joined: Tue Aug 12, 2014 6:55 pm
Location: Werribee, Aust

crocky's Rostock Max V2 Build

Post by crocky »

http://www.cnczone.com/forums/showthread.php?t=35996" onclick="window.open(this.href);return false;

My first CNC began a few years ago and I was really disappointed when I had to sell it as I moved into a lifestyle village. Now with a 3D printer, the noise is not a problem any longer! I can get back into stepper motors and things :)

I have ordered a Rostock Max V2 from our supplier in Australia doodaddoes and it should get here on Monday. I am presently reading as much about them and mods that I can do :)

The journey starts again!
Bob
Rostock Max V2, Ball Cup Arms, New Carriages, HE280, Dampers, PSU Breathing, Simplify 3D, GeckoTek3D, Raspberry Pi3. Duet soon... Kossel Mini still under construction.
Delta's are the way!
User avatar
Eaglezsoar
ULTIMATE 3D JEDI
Posts: 7185
Joined: Sun Apr 01, 2012 5:26 pm

Re: crocky's Rostock Max V2 Build

Post by Eaglezsoar »

crocky wrote:http://www.cnczone.com/forums/showthread.php?t=35996

My first CNC began a few years ago and I was really disappointed when I had to sell it as I moved into a lifestyle village. Now with a 3D printer, the noise is not a problem any longer! I can get back into stepper motors and things :)

I have ordered a Rostock Max V2 from our supplier in Australia doodaddoes and it should get here on Monday. I am presently reading as much about them and mods that I can do :)

The journey starts again!
But isn't the journey fun!
User avatar
crocky
Printmaster!
Posts: 270
Joined: Tue Aug 12, 2014 6:55 pm
Location: Werribee, Aust

Re: crocky's Rostock Max V2 Build

Post by crocky »

I think this one will be pretty enjoyable.

I already have a DaVinci 3D printer and I emailed Isaac and got him to print my favourite test piece and the results he got with out much fiddling around were superb so Rostock Max V2 is the printer to put together. The DaVinci is okay but not in the league of the Rostock and the software is too locked in, there are a few who have gone open source but I don't think it would be worth the pain.

All I am thinking of is to be sure to get the dampers for the tower stepper motors, looks like they make a huge difference to the noise.

Got to decide on what colour to paint the edges of the wood with. If I get white it will be blue, if I get black it should be yellow or orange. I didn't ask what colour it was :) and Isaac was including some other stuff that he thought I would need....

Reading, Reading...
Bob
Rostock Max V2, Ball Cup Arms, New Carriages, HE280, Dampers, PSU Breathing, Simplify 3D, GeckoTek3D, Raspberry Pi3. Duet soon... Kossel Mini still under construction.
Delta's are the way!
User avatar
crocky
Printmaster!
Posts: 270
Joined: Tue Aug 12, 2014 6:55 pm
Location: Werribee, Aust

Re: crocky's Rostock Max V2 Build

Post by crocky »

It's here......

Thanks mcslappy!

I will go and get some paint tomorrow and do the done thing, I think it's going to be yellow.

I have just ordered the vibration dampers for the steppers and a dial test gauge to help me get the bed levelled properly when the time comes.

I've just got to LOOK at all that good stuff in the box....
Bob
Rostock Max V2, Ball Cup Arms, New Carriages, HE280, Dampers, PSU Breathing, Simplify 3D, GeckoTek3D, Raspberry Pi3. Duet soon... Kossel Mini still under construction.
Delta's are the way!
User avatar
Eaglezsoar
ULTIMATE 3D JEDI
Posts: 7185
Joined: Sun Apr 01, 2012 5:26 pm

Re: crocky's Rostock Max V2 Build

Post by Eaglezsoar »

crocky wrote:It's here......

Thanks mcslappy!

I will go and get some paint tomorrow and do the done thing, I think it's going to be yellow.

I have just ordered the vibration dampers for the steppers and a dial test gauge to help me get the bed levelled properly when the time comes.

I've just got to LOOK at all that good stuff in the box....
Enjoy your build!
User avatar
craftymethod
Printmaster!
Posts: 128
Joined: Wed Aug 13, 2014 4:45 am

Re: crocky's Rostock Max V2 Build

Post by craftymethod »

Issac is a trooper! We should almost create an Aussie group haha. Are there any Aussie 3D printing groups online anywhere else?
User avatar
crocky
Printmaster!
Posts: 270
Joined: Tue Aug 12, 2014 6:55 pm
Location: Werribee, Aust

Re: crocky's Rostock Max V2 Build

Post by crocky »

Well I got the melamine all released from the sheets and the only things that took the smile away was a few holes that did not go right through with the laser. A pair of the upper supports had 3 holes in each which didn't go right the way through, lots of time with some various drill bits by hand and I think it will be fine, phew!

A bit of sanding on couple of bits that were not fully cut and I think she will be ready for some paint tomorrow.

I wonder if we asked for a clubhouse group to put on here for the Aussies, I'd hate to have to go somewhere else :) :)
Bob
Rostock Max V2, Ball Cup Arms, New Carriages, HE280, Dampers, PSU Breathing, Simplify 3D, GeckoTek3D, Raspberry Pi3. Duet soon... Kossel Mini still under construction.
Delta's are the way!
McSlappy
Printmaster!
Posts: 809
Joined: Wed Dec 11, 2013 9:11 pm
Location: Queensland, Australia
Contact:

Re: crocky's Rostock Max V2 Build

Post by McSlappy »

Glad it arrived well, and thanks for the kind words :)

Is it a good idea to have our own clubhouse? Then we'd just drink all the beer and not talk to anyone else... Well that's what I'd do :/
I loved my Rostock so much I now sell them in Oz :)
User avatar
crocky
Printmaster!
Posts: 270
Joined: Tue Aug 12, 2014 6:55 pm
Location: Werribee, Aust

Re: crocky's Rostock Max V2 Build

Post by crocky »

Gotto go to bunnings tomorrow to get a few things for the project :)

Permatex will be fun, I have got a few places to try...

The kit came with a 550 power supply too. I had kapton tape already but definitely no connectors and we will try the filament when we get it fired up. I think I will modify the power supply and get rid of all the extra wires, should save some space.
Bob
Rostock Max V2, Ball Cup Arms, New Carriages, HE280, Dampers, PSU Breathing, Simplify 3D, GeckoTek3D, Raspberry Pi3. Duet soon... Kossel Mini still under construction.
Delta's are the way!
User avatar
crocky
Printmaster!
Posts: 270
Joined: Tue Aug 12, 2014 6:55 pm
Location: Werribee, Aust

Re: crocky's Rostock Max V2 Build

Post by crocky »

Just waiting for the undercoat to dry on the second coat...

Got permatex from supercheap auto, it is commonly used for exhaust systems so it was not that hard!

I ended up getting the last tin of orange so it is going to be black with orange trim and it should look the part.
Bob
Rostock Max V2, Ball Cup Arms, New Carriages, HE280, Dampers, PSU Breathing, Simplify 3D, GeckoTek3D, Raspberry Pi3. Duet soon... Kossel Mini still under construction.
Delta's are the way!
User avatar
crocky
Printmaster!
Posts: 270
Joined: Tue Aug 12, 2014 6:55 pm
Location: Werribee, Aust

Re: crocky's Rostock Max V2 Build

Post by crocky »

Back again :)

Progress so far, painted most of it orange (doesn't the thing suck up paint). Installed the motor dampers, had a loss trying to find screws and then I remembered that my crimping pliers had an area for shortening screws :)

Got power supply in and got rid of the un-needed wires, I also got 12volts and 5volts (you never know what mods will happen).

The base is pretty well done now, the fun will be when I get to the Rambo!
The Bandit So Far
The Bandit So Far
Sitting on my wheelchair :)
Bob
Rostock Max V2, Ball Cup Arms, New Carriages, HE280, Dampers, PSU Breathing, Simplify 3D, GeckoTek3D, Raspberry Pi3. Duet soon... Kossel Mini still under construction.
Delta's are the way!
geneb
ULTIMATE 3D JEDI
Posts: 5365
Joined: Mon Oct 15, 2012 12:47 pm
Location: Graham, WA
Contact:

Re: crocky's Rostock Max V2 Build

Post by geneb »

I like it. It's kind of the reverse of Orange Menace. :)

g.
Delta Power!
Defeat the Cartesian Agenda!
http://www.f15sim.com - 80-0007, The only one of its kind.
http://geneb.simpits.org - Technical and Simulator Projects
User avatar
Eaglezsoar
ULTIMATE 3D JEDI
Posts: 7185
Joined: Sun Apr 01, 2012 5:26 pm

Re: crocky's Rostock Max V2 Build

Post by Eaglezsoar »

geneb wrote:I like it. It's kind of the reverse of Orange Menace. :)

g.
Anything is the reverse of the Orange Menace! :D
User avatar
crocky
Printmaster!
Posts: 270
Joined: Tue Aug 12, 2014 6:55 pm
Location: Werribee, Aust

Re: crocky's Rostock Max V2 Build

Post by crocky »

Progress Again :)

The hot bed is all soldered up and fitted, there is a mess of wires coming out where the rambo will fit!!!!
The base with the hot bed
I like how the top of the base has the X, Y and Z printed out.

I have made a start with the top piece.
Top plate with endstops
and today, I will put the wires into the tubes and hopefully get them mounted.

I have got a few bits coming from ebay, I'm going to do the McSlappy hotend heater mod.
Bob
Rostock Max V2, Ball Cup Arms, New Carriages, HE280, Dampers, PSU Breathing, Simplify 3D, GeckoTek3D, Raspberry Pi3. Duet soon... Kossel Mini still under construction.
Delta's are the way!
User avatar
crocky
Printmaster!
Posts: 270
Joined: Tue Aug 12, 2014 6:55 pm
Location: Werribee, Aust

Re: crocky's Rostock Max V2 Build

Post by crocky »

Well, got the towers on it and put it up on the filing cabinet. I had the previous 3D printer on it and it seems to kill the noise fairly well.

I am just starting the cheapskate setup now :)
Legs Up
Legs Up
Bob
Rostock Max V2, Ball Cup Arms, New Carriages, HE280, Dampers, PSU Breathing, Simplify 3D, GeckoTek3D, Raspberry Pi3. Duet soon... Kossel Mini still under construction.
Delta's are the way!
User avatar
crocky
Printmaster!
Posts: 270
Joined: Tue Aug 12, 2014 6:55 pm
Location: Werribee, Aust

Re: crocky's Rostock Max V2 Build

Post by crocky »

What I have done....

Cheapskates tightened, belts fitted, extruder fitted, reel holder fitted, LCD fitted (some those nuts are real small and difficult to fit, but....).

Just have to get the poles perfectly at 90 degrees and then tighten them up, gotta find the square!

I am waiting for a few things from eBay including the special crimping pliers for the Rambo board
Bob
Rostock Max V2, Ball Cup Arms, New Carriages, HE280, Dampers, PSU Breathing, Simplify 3D, GeckoTek3D, Raspberry Pi3. Duet soon... Kossel Mini still under construction.
Delta's are the way!
McSlappy
Printmaster!
Posts: 809
Joined: Wed Dec 11, 2013 9:11 pm
Location: Queensland, Australia
Contact:

Re: crocky's Rostock Max V2 Build

Post by McSlappy »

Looking really awesome now! Man I'm tempted to tear on of mine down just to paint it.... Maybe a v2 upgrade kit would be a good excuse... And put in some Astrosyn dampers at the same time and make a stealth machine.... Oh man I feel all tickly inside...
I loved my Rostock so much I now sell them in Oz :)
User avatar
crocky
Printmaster!
Posts: 270
Joined: Tue Aug 12, 2014 6:55 pm
Location: Werribee, Aust

Re: crocky's Rostock Max V2 Build

Post by crocky »

Progress!
Progress!
Well, still waiting for the crimping pliers.

The taps arrived through the week so the hot end is done apart from the crimp terminals, it is pretty well all done now.... Just waiting.....

Put repetier on the DaVinci today, waiting for a new heat bed before I can do a full test with it.
Bob
Rostock Max V2, Ball Cup Arms, New Carriages, HE280, Dampers, PSU Breathing, Simplify 3D, GeckoTek3D, Raspberry Pi3. Duet soon... Kossel Mini still under construction.
Delta's are the way!
User avatar
Eaglezsoar
ULTIMATE 3D JEDI
Posts: 7185
Joined: Sun Apr 01, 2012 5:26 pm

Re: crocky's Rostock Max V2 Build

Post by Eaglezsoar »

Hi Crocky! Good looking printer with a nice paint job. Great job!
User avatar
Eaglezsoar
ULTIMATE 3D JEDI
Posts: 7185
Joined: Sun Apr 01, 2012 5:26 pm

Re: crocky's Rostock Max V2 Build

Post by Eaglezsoar »

McSlappy wrote:Looking really awesome now! Man I'm tempted to tear on of mine down just to paint it.... Maybe a v2 upgrade kit would be a good excuse... And put in some Astrosyn dampers at the same time and make a stealth machine.... Oh man I feel all tickly inside...
I can only imagine what it feels like to be all tickly inside, must be a great feeling.
User avatar
crocky
Printmaster!
Posts: 270
Joined: Tue Aug 12, 2014 6:55 pm
Location: Werribee, Aust

Re: crocky's Rostock Max V2 Build

Post by crocky »

Crimping pliers finally arrived!!!

Now I can get back to working on all of the wires that need them :)

Nearly ready to fire it up!
Bob
Rostock Max V2, Ball Cup Arms, New Carriages, HE280, Dampers, PSU Breathing, Simplify 3D, GeckoTek3D, Raspberry Pi3. Duet soon... Kossel Mini still under construction.
Delta's are the way!
User avatar
crocky
Printmaster!
Posts: 270
Joined: Tue Aug 12, 2014 6:55 pm
Location: Werribee, Aust

Re: crocky's Rostock Max V2 Build

Post by crocky »

Well it is finally done and currently printing the fan shroud :)

There is a few funny pops as it is going along but I will leave it while it is happily printing.

The setting was a fun exercise for a wheelchair bloke, go to the printer and set some paper then back to the computer and...... on it went for about 4 times :)

I'm using kisslicer and it looks like it is building some support structure for the model, probably a bit much but it is a test! I am using the mhackney configuration...

Piccys when it finishes the print!
Bob
Rostock Max V2, Ball Cup Arms, New Carriages, HE280, Dampers, PSU Breathing, Simplify 3D, GeckoTek3D, Raspberry Pi3. Duet soon... Kossel Mini still under construction.
Delta's are the way!
User avatar
crocky
Printmaster!
Posts: 270
Joined: Tue Aug 12, 2014 6:55 pm
Location: Werribee, Aust

Re: crocky's Rostock Max V2 Build

Post by crocky »

Got to take little bit more wood off the power supply board, the stepper in that position is too noisy.. must be still touching!
Bob
Rostock Max V2, Ball Cup Arms, New Carriages, HE280, Dampers, PSU Breathing, Simplify 3D, GeckoTek3D, Raspberry Pi3. Duet soon... Kossel Mini still under construction.
Delta's are the way!
Aurora900
Printmaster!
Posts: 98
Joined: Sun Sep 21, 2014 7:51 pm
Location: Long Island, New York

Re: crocky's Rostock Max V2 Build

Post by Aurora900 »

I love the colors, great choice :)

I hope your shrouds came out well!
User avatar
crocky
Printmaster!
Posts: 270
Joined: Tue Aug 12, 2014 6:55 pm
Location: Werribee, Aust

Re: crocky's Rostock Max V2 Build

Post by crocky »

*** MODs to Rostock Max V2 kit

Painted the edges orange, not really necessary and it is kind of rough!

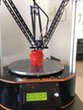
Named the thing The Bandit, something to do with me being one armed!

Fitted the dampeners to the three steppers in the base, really makes a huge difference to the noise.

Changed the Rambo fan for a Noctua NF-A4x10 Premium Fan, too many stories of failures in the forum pages.

Did the McSlappy hot end heater cartridge and the screw in thermistor mods.

After hearing of lots of power supply problems I am leaving the rear covers off until I have fitted a Noctua NF-A9x14 Premium Fan. The power supply breaths a lot better in the kits that are coming out with the new multi slot baseboards with particular attention to the power supply area.

I have PEI on the way :)

I am waiting for a 18 led 60mm circle to arrive and I will make an adaptor and mount it to the hot end.

That should be enough for a little while, I really just want to enjoy it now!!

Thanks to all those who helped.
Bob
Rostock Max V2, Ball Cup Arms, New Carriages, HE280, Dampers, PSU Breathing, Simplify 3D, GeckoTek3D, Raspberry Pi3. Duet soon... Kossel Mini still under construction.
Delta's are the way!
Post Reply

Return to “The Build Zone”