So here I am much of the way through base building for my Rostock V3. I'm having an issue finding the right bits according to he guide and the 'wire the hotbed' section is super lacking. Anyone have a better visual of the parts I'm supposed to install and how?
EDIT:
Cancel that. Saw the video. And feel very dumb. But it looks like I'm needing tape for this and I didn't get any in the bag or the box that I can use. Am I missing it or is it assumed I'd have it?
Or1g1nal1ty and his slow, plodding build!
-
Or1g1nal1ty
- Plasticator
- Posts: 16
- Joined: Sat Sep 17, 2016 4:05 am
Re: Or1g1nal1ty and his slow, plodding build!
I would recommend doing the soldering on the plate, setting the base to one side and moving on. Order the tape from amazon the appropriate shipping speed for your build. It was not included in the build. If you feel it should have been included, you may want to drop a suggestion to SeemeCNC as I did.
-Dwight
-Dwight
-
Or1g1nal1ty
- Plasticator
- Posts: 16
- Joined: Sat Sep 17, 2016 4:05 am
Re: Or1g1nal1ty and his slow, plodding build!
Can do. Will suggest that a roll of it be included.
-
Or1g1nal1ty
- Plasticator
- Posts: 16
- Joined: Sat Sep 17, 2016 4:05 am
Re: Or1g1nal1ty and his slow, plodding build!
Okay, so i've run into an issue with the r4 bearing covers. I simply cannot get them seated properly without doing damage to them. I'm not a small man but i'm putting all my weight on them to get them to pop into place and they aren't. They are stuck at flush with the cover, and not moving anymore. Please tell me its not necessary that they are perfectly in the middle of the cover? Any ideas?
-
barry99705

- Printmaster!
- Posts: 707
- Joined: Sun Aug 11, 2013 6:10 pm
- Location: west ohio
Re: Or1g1nal1ty and his slow, plodding build!
I used one of these to seat mine.
https://www.lowes.com/pd/IRWIN-QUICK-GR ... mp/1205683
https://www.lowes.com/pd/IRWIN-QUICK-GR ... mp/1205683
Never do anything you don't want to have to explain to the paramedics.
-
Or1g1nal1ty
- Plasticator
- Posts: 16
- Joined: Sat Sep 17, 2016 4:05 am
Re: Or1g1nal1ty and his slow, plodding build!
I have a smaller and similar one but it just gets the bearing flush and not centered. Sigh. Off to get a tool for this now.
Re: Or1g1nal1ty and his slow, plodding build!
I used a vice and the recommended socket size.
-
Or1g1nal1ty
- Plasticator
- Posts: 16
- Joined: Sat Sep 17, 2016 4:05 am
Re: Or1g1nal1ty and his slow, plodding build!
Used the sockets they worked. My hands hurt like hell though! Now i'm on to the stepper motors in the part 2 and 3 of the top assembly
The drive gears are fit for three of the motors. As I put the three on, two fit snugly and well, especially after adding locktite. The third however spins freely even with locktite added. Is there something I'm doing wrong?
The drive gears are fit for three of the motors. As I put the three on, two fit snugly and well, especially after adding locktite. The third however spins freely even with locktite added. Is there something I'm doing wrong?
-
Or1g1nal1ty
- Plasticator
- Posts: 16
- Joined: Sat Sep 17, 2016 4:05 am
Re: Or1g1nal1ty and his slow, plodding build!
And I got them attached and secured, build, and RAMBO installed and put together. Moving onto the LCD panel piece today. Consistantly think i'm in over my head 
-
Or1g1nal1ty
- Plasticator
- Posts: 16
- Joined: Sat Sep 17, 2016 4:05 am
Re: Or1g1nal1ty and his slow, plodding build!
Alright, so i've been making progress weekly and finally got everything running. I'm installing the arduino setup right now and noticed the guide has nothing to get the raspberry pi option to run as the addon for the kit. Anywhere I could get started with this?
-
Or1g1nal1ty
- Plasticator
- Posts: 16
- Joined: Sat Sep 17, 2016 4:05 am
Re: Or1g1nal1ty and his slow, plodding build!
Let me actually back up. Forget the pi. I go to calibrate my machine and i think something is quite wrong.
I do the 'home' command, g28, and the motors pull the head all the awy to the top and them the machine vibrates hard for a good 15 seconds making a loud rumble. Then it stops. Assuming this was fine for a first home I then go to calibrate, and it makes the same horrible noise, drops then starts sounding normal, trhen taps the end against the x axis then moves to the y...then nothing. The machine freezes. Attached is the log, you can see it's basically stuck and trying to initialize the accelerometer. And then the machine totally freeze, can't do anything until i disconnect and power down. SEE EDIT
Any help?
EDIT: Made a youtube video. Pretty sure something is seriously borked. Checked all the wiring (yes my thermistors are broken for different reasons) and had a buddy come by who's an electrical engineer - it's not on the build side. Any ideas?
Video: https://www.youtube.com/watch?v=Z62mLD70LFg
- Attachments
-
 print_log.txt
- (16.88 KiB) Downloaded 210 times
-
Or1g1nal1ty
- Plasticator
- Posts: 16
- Joined: Sat Sep 17, 2016 4:05 am
Re: Or1g1nal1ty and his slow, plodding build!
Sigh. Got it.
The screws that are on the arms are supposed to go INTO the holeabove and they were each just missing it.
The screws that are on the arms are supposed to go INTO the holeabove and they were each just missing it.
Re: Or1g1nal1ty and his slow, plodding build!
You mean the end stop screws? They look like they were not correctly fittedOr1g1nal1ty wrote:Sigh. Got it.
The screws that are on the arms are supposed to go INTO the holeabove and they were each just missing it.
Bob
Rostock Max V2, Ball Cup Arms, New Carriages, HE280, Dampers, PSU Breathing, Simplify 3D, GeckoTek3D, Raspberry Pi3. Duet soon... Kossel Mini still under construction.
Delta's are the way!
Rostock Max V2, Ball Cup Arms, New Carriages, HE280, Dampers, PSU Breathing, Simplify 3D, GeckoTek3D, Raspberry Pi3. Duet soon... Kossel Mini still under construction.
Delta's are the way!
-
Or1g1nal1ty
- Plasticator
- Posts: 16
- Joined: Sat Sep 17, 2016 4:05 am
Re: Or1g1nal1ty and his slow, plodding build!
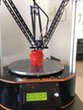
Alright. So my benchy is printing. Had to bribe an electrical engineer friend to come help me but it's going now! Yay!