http://www.amazon.com/gp/product/B007Y7 ... UTF8&psc=1
This is what I got.
PEI print bed surface experiments
-
doctorgonzo
- Printmaster!
- Posts: 108
- Joined: Thu May 16, 2013 7:46 am
- Location: Atlanta GA
Re: PEI print bed surface experiments
Thanks for the windex trick. I will try as well with my replacement. The above adhesive is the same as I used on my PEI.
My 3D-Printing learning curve is asymptotic to a Delta's X, Y and Z-axes
-
Eaglezsoar

- ULTIMATE 3D JEDI
- Posts: 7185
- Joined: Sun Apr 01, 2012 5:26 pm
Re: PEI print bed surface experiments
Thanks for the link, I don't know why a search for the piece didn't work but with your link I don't need to search.
Re: PEI print bed surface experiments
I have used PEI from the git-go and it has been awesome!!!
Importantly, I have noticed a bit of variation in my print bed and have recognized that this is due to my initial "trying to pry, torque or twist off a print" from PEI surface before it is cool. What I have noticed is that now my first layer of my prints are "thin in the areas that I have lifted, twisted and torqued" my pieces. I suspect I am actually lifting the PEI when at 95-100 degrees C and sucking some of the TapeCase 468MP adhesive and creating a bit of an elevation in the bed layer at that "tension point".
Thus, caution...... if the PEI is hot, don't force it or you may distort the surface of your PEI print surface!!!
In short, do not torqued or pull on a finished print. When a print is cool it simply pops off of PEI. Or if the bed is hot, use compressed gas to pop the print off. This works quite well with a hot bed and you don't need to pry or torque.
My 3D-Printing learning curve is asymptotic to a Delta's X, Y and Z-axes
-
BenTheRighteous
- Printmaster!
- Posts: 695
- Joined: Fri Nov 07, 2014 9:38 am
Re: PEI print bed surface experiments
Yep, noticed the same thing when I went to sand my PEI sheet yesterday. I somehow created a groove in the middle of the PEI, not sure when it happened, but I can definitely believe it was from me trying to dislodge a print much too soon.3D-Print wrote:Thus, caution...... if the PEI is hot, don't force it or you may distort the surface of your PEI print surface!!!
It does introduce a minor defect into the bottom of my prints, at this point it's only cosmetic and I'm not too worried about it, but PEI is not indestructible. Be careful, treat it with respect!
nitewatchman wrote:it was much cleaner and easier than killing a chicken on top of the printer.
-
Renha

- Printmaster!
- Posts: 282
- Joined: Fri Apr 11, 2014 2:18 am
- Location: Balashikha, Russian Federation
- Contact:
Re: PEI print bed surface experiments
Any chance for Taulman 910 Alloy? Or it is completely nylonic?
3D printing is magic!
Sorry my engrish :-/ you could PM me in Russian.
Sorry my engrish :-/ you could PM me in Russian.
-
gchristopher
- Printmaster!
- Posts: 175
- Joined: Mon Dec 08, 2014 2:09 am
Re: PEI print bed surface experiments
If only my google search history could talk...
"3m 468 tape cutting" (the edges of the 1" roll are pretty blobby and uneven, I just discovered.)
"3m 468 tape removal"
"3m 468 solvent"
The tape is down with only one ugly gap and very minimal bubbling. But wow, the edges of the tape roll are dangerous when the blobs on the side come loose and get caught underneath.
Next up, to try placing the sheet! If I had it to do again, I think I'd buy the 12x12 adhesive sheet and try the windex method posted by doctorgonzo.
Well, even with adhesive strips, the result looks pretty serviceable. Thanks to everyone for working this out!
Here's the first test print.
[img]http://gchristopher.net/3dprinting/level_test.jpg[/img]

Re: PEI print bed surface experiments
I've read a few people using the single sheet and a small amount of water/Windex during installation and was wondering the outcome? I haven't heard of any of them coming back and saying whether it was a mess or a success.

Re: PEI print bed surface experiments
It works great and is how I do it now exclusively.
Sublime Layers - my blog on Musings and Experiments in 3D Printing Technology and Art
Start Here:
A Strategy for Successful (and Great) Prints
Strategies for Resolving Print Artifacts
The Eclectic Angler
Re: PEI print bed surface experiments
Beautiful! Thank you. I took the gamble and ordered it that way.mhackney wrote:It works great and is how I do it now exclusively.
Re: PEI print bed surface experiments
When you get the time it might be good to update the sticky thread, it still has the older non Windex version and strips version of the procedure.mhackney wrote:It works great and is how I do it now exclusively.
-
stonewater
- Printmaster!
- Posts: 345
- Joined: Mon Jan 06, 2014 1:24 am
Re: PEI print bed surface experiments
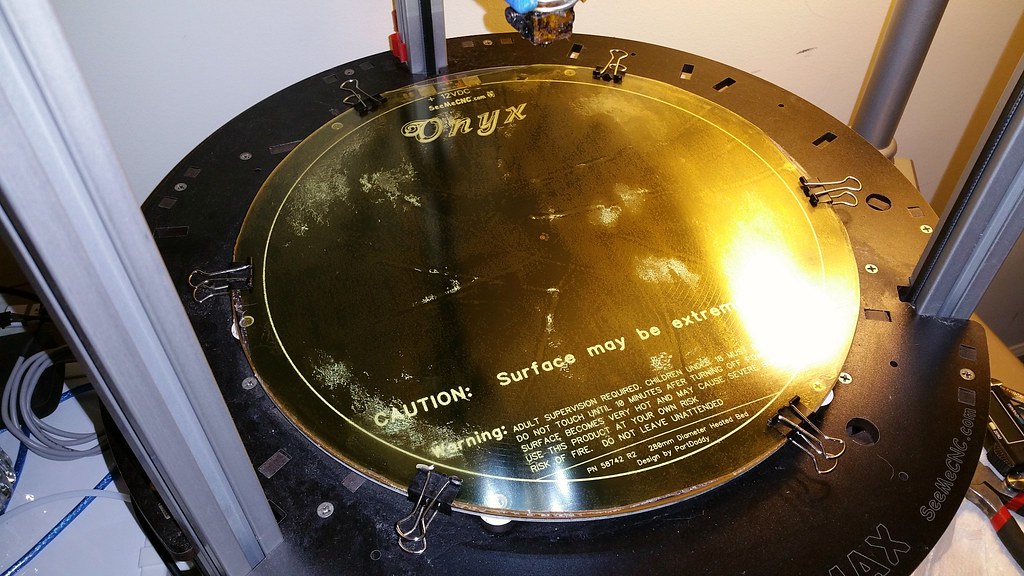
mounted my PEI (windex method) and its on the printer, first print coming after a new Z zero. used a 12x12 piece of 3M and a 12x12 piece of PEI. about 1/4 inch of glass showing around 4 edges of the "square on a circle"
I also installed my rev 7 onyx bed... heating really is much better.... less than 10 degrees diff center to edge.
Tom C
I also installed my rev 7 onyx bed... heating really is much better.... less than 10 degrees diff center to edge.
Tom C
MAX V1
325 MM carbon arms trick trucks effector mount LED ring heat spreader
Corvair750
V6 Hotend
Robo 3D
Flashforge creator
http://WWW.TeslagenX.com" onclick="window.open(this.href);return false; - Bedini experimenter kits, books, DVD's
325 MM carbon arms trick trucks effector mount LED ring heat spreader
Corvair750
V6 Hotend
Robo 3D
Flashforge creator
http://WWW.TeslagenX.com" onclick="window.open(this.href);return false; - Bedini experimenter kits, books, DVD's
-
stonewater
- Printmaster!
- Posts: 345
- Joined: Mon Jan 06, 2014 1:24 am
Re: PEI print bed surface experiments
first print results.... I have printed with hairspray,purple glue stick, the purple glue stick dissolved in water and brushed on with foam brush, and with PEI. you get similar results as far as finish goes if you use the brushed on purple glue or the PEI if you have the gloss side up. mine came with one side Matte and 1 side gloss, I put the gloss side up. as far as adhesion goes, the PEI is definitely better. with that being said, I had a hard time getting the skirt loops off the PEI bed after the print was done. I have no qualms attacking the glue stick bed with a razor edge to get extra plastic off, not comfortable at all Doing this with PEI. it was a very frustrating time getting it off.
also it appears I did not completely get all the Windex out of the bed as I had a hi spot that was "cooking" underneath. I carefully pulled the PEI off and will try again tonight.
Tom C
also it appears I did not completely get all the Windex out of the bed as I had a hi spot that was "cooking" underneath. I carefully pulled the PEI off and will try again tonight.
Tom C
MAX V1
325 MM carbon arms trick trucks effector mount LED ring heat spreader
Corvair750
V6 Hotend
Robo 3D
Flashforge creator
http://WWW.TeslagenX.com" onclick="window.open(this.href);return false; - Bedini experimenter kits, books, DVD's
325 MM carbon arms trick trucks effector mount LED ring heat spreader
Corvair750
V6 Hotend
Robo 3D
Flashforge creator
http://WWW.TeslagenX.com" onclick="window.open(this.href);return false; - Bedini experimenter kits, books, DVD's
-
Renha
- Printmaster!
- Posts: 282
- Joined: Fri Apr 11, 2014 2:18 am
- Location: Balashikha, Russian Federation
- Contact:
Re: PEI print bed surface experiments
> I had a hard time getting the skirt loops off the PEI bed after the print was done.
looks like you have bad bed leveling, printing first layer at too low height, I had such issues too, after accurate leveling it's gone
looks like you have bad bed leveling, printing first layer at too low height, I had such issues too, after accurate leveling it's gone
3D printing is magic!
Sorry my engrish :-/ you could PM me in Russian.
Sorry my engrish :-/ you could PM me in Russian.

Re: PEI print bed surface experiments
It has been several months since i installed my pei sheet.
I used the 12x12 in adhesive tape that was discussed in this thread. And it has started to let go.
It no longer holds the pei stuck to the glass. The corners are lifting off the bed. I have about 15cm2 that is not stuck to the bed with 1mm to 5mm air gap.
My pei might be warped aswell. It was time to clean it up anyways...
When on mobile I am brief and may be perceived as an arsl.
-
Eaglezsoar
- ULTIMATE 3D JEDI
- Posts: 7185
- Joined: Sun Apr 01, 2012 5:26 pm
Re: PEI print bed surface experiments
Could you refresh our memories on how you mounted the PEI to the bed and glass? I am curious which method you used because I would like to prevent thatteoman wrote:It has been several months since i installed my pei sheet.
I used the 12x12 in adhesive tape that was discussed in this thread. And it has started to let go.
It no longer holds the pei stuck to the glass. The corners are lifting off the bed. I have about 15cm2 that is not stuck to the bed with 1mm to 5mm air gap.
My pei might be warped aswell. It was time to clean it up anyways...
from happening, if possible. Thanks!
Re: PEI print bed surface experiments
I had the tape flexed curled an slowly lay it on the pei (30 minute process) slowly and firmly pressing / rubbung it on. So slowly rolling it on in essence.
Then i did the same with the pei to the glass. I hope that makes sense.
I did have two ssr incidents where i saw 160 degs on the LCD.
Then i did the same with the pei to the glass. I hope that makes sense.
I did have two ssr incidents where i saw 160 degs on the LCD.
When on mobile I am brief and may be perceived as an arsl.
-
Eaglezsoar
- ULTIMATE 3D JEDI
- Posts: 7185
- Joined: Sun Apr 01, 2012 5:26 pm
Re: PEI print bed surface experiments
Thanks for the reply. The incidences of the high heat could play a role in causing your PEI to become unstuck,teoman wrote:I had the tape flexed curled an slowly lay it on the pei (30 minute process) slowly and firmly pressing / rubbung it on. So slowly rolling it on in essence.
Then i did the same with the pei to the glass. I hope that makes sense.
I did have two ssr incidents where i saw 160 degs on the LCD.
your application sounds fine. If you discover more or have a brainstorm on what caused it please let us know.
-
stonewater
- Printmaster!
- Posts: 345
- Joined: Mon Jan 06, 2014 1:24 am
Re: PEI print bed surface experiments
the printer is calibrated quite well... I am printing .3 first layer, measures about that all the way around, a bit less maybe.... metric digital micrometer and digital calipers, the thickness is consistent. I think I will do my skirts not attached to the part anymore....Renha wrote:> I had a hard time getting the skirt loops off the PEI bed after the print was done.
looks like you have bad bed leveling, printing first layer at too low height, I had such issues too, after accurate leveling it's gone
really happy with the PEI I would recommend it for sure. just have to wait a bit longer for the bed to cool enough to allow the part to be removed.
Tom C
MAX V1
325 MM carbon arms trick trucks effector mount LED ring heat spreader
Corvair750
V6 Hotend
Robo 3D
Flashforge creator
http://WWW.TeslagenX.com" onclick="window.open(this.href);return false; - Bedini experimenter kits, books, DVD's
325 MM carbon arms trick trucks effector mount LED ring heat spreader
Corvair750
V6 Hotend
Robo 3D
Flashforge creator
http://WWW.TeslagenX.com" onclick="window.open(this.href);return false; - Bedini experimenter kits, books, DVD's
Re: PEI print bed surface experiments
I am adding to the sticky post on PEI a process I developed to fix scratches and divots in your PEI!
Sublime Layers - my blog on Musings and Experiments in 3D Printing Technology and Art
Start Here:
A Strategy for Successful (and Great) Prints
Strategies for Resolving Print Artifacts
The Eclectic Angler
Re: PEI print bed surface experiments
Eaglezsoar wrote:Thanks for the reply. The incidences of the high heat could play a role in causing your PEI to become unstuck,teoman wrote:I had the tape flexed curled an slowly lay it on the pei (30 minute process) slowly and firmly pressing / rubbung it on. So slowly rolling it on in essence.
Then i did the same with the pei to the glass. I hope that makes sense.
I did have two ssr incidents where i saw 160 degs on the LCD.
your application sounds fine. If you discover more or have a brainstorm on what caused it please let us know.
The culprit may have been heating pei while it was not clamped.
When on mobile I am brief and may be perceived as an arsl.

Re: PEI print bed surface experiments
Just finished installing my PEI sheet last night (0.030" 12"x12" sheet from amazon laminated with 468MP sheet) and first off...I have no idea how anyone can install this without any air bubbles. I did the float each layer on windex to align, then used my vinyl application squeegee to press each layer down. I let each layer sit 12 hours before going to the next step. There are tons of micro bubbles under the finished part, but it looks to be completely secure and flat with no folds or big bubbles in the tape.
Second thing to note...holy crap does this stuff hold a part down. I currently print with a 90C bed temperature and I couldn't get my first ABS print off without a lot of effort. I think I'm going to have to lower my bed or first layer extrusion temp a bit.
[img]https://c1.staticflickr.com/1/654/21514 ... 03ae_b.jpg[/img]
Current Machines || Rostock Max (V1) | V3DR ||
Previous Machines || Flashforge Creator Pro ||
Previous Machines || Flashforge Creator Pro ||
Re: PEI print bed surface experiments
There is absolutely nothing wrong with lots of those small bubbles. All of mine have them and I have no problems with flatness or separation.
Firstly, make sure you have Z=0 set correctly, print a single layer part (see my signature, there is a model in that post) and measure it to make sure it is what you specify. Many folks have a tendency to squish their first layer to get good adhesion. You do not want to do that with PEI or you won't be able to remove the part. You can also lower the bed temp. I print ABS at about 75C on PEI. The first layer extrusion can be the same as the rest of your part.
Firstly, make sure you have Z=0 set correctly, print a single layer part (see my signature, there is a model in that post) and measure it to make sure it is what you specify. Many folks have a tendency to squish their first layer to get good adhesion. You do not want to do that with PEI or you won't be able to remove the part. You can also lower the bed temp. I print ABS at about 75C on PEI. The first layer extrusion can be the same as the rest of your part.
Sublime Layers - my blog on Musings and Experiments in 3D Printing Technology and Art
Start Here:
A Strategy for Successful (and Great) Prints
Strategies for Resolving Print Artifacts
The Eclectic Angler
Re: PEI print bed surface experiments
Bed was re-zero'd before the print and first layer looked good. 75C bed temp with ABS is kind of amazing though...definitely sounds like I should do a few trials with lower temps.
Also, for ABS on glue stick I usually print my first 2 layers 5C hotter than the rest of the layers, so I'll probably try putting the kabash on that as well.
Also, for ABS on glue stick I usually print my first 2 layers 5C hotter than the rest of the layers, so I'll probably try putting the kabash on that as well.
Current Machines || Rostock Max (V1) | V3DR ||
Previous Machines || Flashforge Creator Pro ||
Previous Machines || Flashforge Creator Pro ||
Re: PEI print bed surface experiments
Not to be critical, but you can't look at a layer and tell how thick it is. "Looking good" is not the same as measuring it to be sure. A .02mm difference is like night and day. Another approach (but not as good as measuring) is to print a first layer, peal it up and if it is stuck too firmly, decrease your Z by .02mm. Repeat until you get good adhesion and easy removal. A single layer should peal off the PEI with some resistance but no tearing or ripping.
Glue stick actually is quite thick depending on how it is applied. It can be applied thick enough to affect the actual first layer thickness.
EDIT - I originally stated .05mm when I meant .02mm - my vertical dyslexia kicking in. The above is corrected.
Glue stick actually is quite thick depending on how it is applied. It can be applied thick enough to affect the actual first layer thickness.
EDIT - I originally stated .05mm when I meant .02mm - my vertical dyslexia kicking in. The above is corrected.
Sublime Layers - my blog on Musings and Experiments in 3D Printing Technology and Art
Start Here:
A Strategy for Successful (and Great) Prints
Strategies for Resolving Print Artifacts
The Eclectic Angler