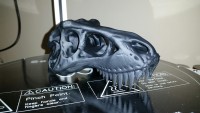
Finally got around to cutting and installing a Heat Spreader Plate for my printer. I have been trying to print the Akemake Spiral Speakers and the edges of my bed were just too cold. The temperature difference from the center to the edge was quite high. It ranged from burn you in the center to touch and hold on the edges, okay maybe for not very long but there was quite a difference and ABS would not stay down. Now it is burn you everywhere!
After adding the 1/16" thick plate the temperature variance on the bed from edge to center to edge in any direction is 3 deg. C. Can't wait to see how much difference it makes. I think that I will try it again with hair spray and then move to a PEI Sheet to compare the difference. I have had a 1mm thick piece of PEI laying in the floor for a couple of weeks. Hopefully this will make a even bigger difference.
The printing and reliability is getting better one small step at a time.
nitewatchman
New Heat Spreader
-
nitewatchman

- Printmaster!
- Posts: 626
- Joined: Thu May 01, 2014 9:51 pm
- Location: Birmingham, Alabama
New Heat Spreader
- Attachments
-
- Copper Plate Clamped To Bed
-
-
- Copper Plate Between Heated Bed and Build Glass
Last edited by nitewatchman on Thu Jul 03, 2014 4:01 pm, edited 1 time in total.
-
Eaglezsoar

- ULTIMATE 3D JEDI
- Posts: 7185
- Joined: Sun Apr 01, 2012 5:26 pm
Re: New Heat Spreader
Very good job!
It is rare to see a copper instead of aluminum for the plate but it seems like a good move if you have
a source for the copper and can afford it.
Thanks for sharing the pictures with us!
It is rare to see a copper instead of aluminum for the plate but it seems like a good move if you have
a source for the copper and can afford it.
Thanks for sharing the pictures with us!
“ Do Not Regret Growing Older. It is a Privilege Denied to Many. ”
-
nitewatchman
- Printmaster!
- Posts: 626
- Joined: Thu May 01, 2014 9:51 pm
- Location: Birmingham, Alabama
Re: New Heat Spreader
All in all while more expensive that aluminum, the copper wasn't outrageous. The 12"x12" piece was $52 (verses $8.32 for Aluminum) from OnLine Metals. This is less shipping because we had a larger order of other metallics coming from them for the other side of the business (SynerTech, LLC) and it was included with those. Shipping would likely add $8-$10.
The circle (with clipped sides) was sawed out of the square using a Scroll Saw and a couple of blades designed for wood. Checking closely there seems to be about an 8 degree difference in what the bed thermistor reports relative to an interferometer at 95C, at room temperature it appears to be correct. Next step is to verify the error to be correct and correct the thermistor table.
Really appreciate all the help, comments, directions and candor about what did not work that is posted here. Really helps ease the pain.
nitewatchman
-
bvandiepenbos

- Printmaster!
- Posts: 927
- Joined: Thu Apr 05, 2012 11:25 pm
- Location: Goshen, IN
- Contact:
Re: New Heat Spreader
Nice! love the copper plate. How thick is it?
This would be perfect if I every get the time to build a "Steampunk" Delta ! ...something I have been wanting to do for a long time just for fun. Either that or a "Rat Rod" style Delta.
I have found that a 1/16" thick aluminum plate works great also.
This would be perfect if I every get the time to build a "Steampunk" Delta ! ...something I have been wanting to do for a long time just for fun. Either that or a "Rat Rod" style Delta.
I have found that a 1/16" thick aluminum plate works great also.
~*Brian V.
RostockMAX v2 (Stock)
MAX METAL "ShortyMAX"
MAX METAL Rostock MAX Printer Frame
NEMESIS Air Delta v1 & v2 -Aluminum delta printers
Rostock MAX "KITT" - Tri-Force Frame
GRABER i3 "Slim"
RostockMAX v2 (Stock)
MAX METAL "ShortyMAX"
MAX METAL Rostock MAX Printer Frame
NEMESIS Air Delta v1 & v2 -Aluminum delta printers
Rostock MAX "KITT" - Tri-Force Frame
GRABER i3 "Slim"
-
nitewatchman
- Printmaster!
- Posts: 626
- Joined: Thu May 01, 2014 9:51 pm
- Location: Birmingham, Alabama
Re: New Heat Spreader
I thought it was 1mm but I went back and checked. It is 1/16" OFC Copper.
nitewatchman
nitewatchman
Re: New Heat Spreader
I am awaiting my FIRST kit, but thinking ahead to some sort of a heat spreader.
The local hardware store has some aluminum "expanded metal" sheet that I thought might work, but now I'm wondering if all the "holes" in it would actually encourage hot and cold spots.
I was thinking that heat spreaders would go BETWEEN the heat pad and the glass, but it seems you print right ON the copper (or aluminum).
BTW, how do you get the sheet metal absolutely FLAT (or flat enough) ?
\Newbie in training.
-
nitewatchman
- Printmaster!
- Posts: 626
- Joined: Thu May 01, 2014 9:51 pm
- Location: Birmingham, Alabama
Re: New Heat Spreader
The appearance is an illusion, the copper is between the Heated Bed and the Glass. The copper sheet is 1/2 Hard which makes it a little stiffer. I had to tweak one corner using a straight edge but that wasn't very difficult.
I don't think that I would use the perforated metal, the holes results in a loss of mass and most of the heat transfer is through conduction at this temperature so surface area is your friend.
I do a lot of business with OnLine Metals, suggest that you look at their site.
nitewatchman
I don't think that I would use the perforated metal, the holes results in a loss of mass and most of the heat transfer is through conduction at this temperature so surface area is your friend.
I do a lot of business with OnLine Metals, suggest that you look at their site.
nitewatchman
Re: New Heat Spreader
Thanks for the clarification.
Not to get TOO off topic, but do you use any thermal bonding agent either between the glass and copper or between the onyx and copper (or both) ?
I have some electronics background and I am thinking of the "IMPORTANCE" of this with heat sinks - since the heat spreader is acting as a heat sink, OK as a dissipater.
I guess this is a general question; Do folk usually use thermal bonding between heating pad/heat spreader/build plate ?
Follow-up question; Should they ?
I am not far from Wallingford, CT.
Maybe I'll try to get there the next trip I make out Danbury way (-:

Re: New Heat Spreader
RegB, I've been using aluminum heat dissipator for over 18 months with no thermal grease or paste. It isn't needed. It would make a mess on the plate-glass side every time you took the glass off. The heat transfer from Onyx to the aluminum and to the glass is not a problem. My glass is almost dead on what the thermistor says AFTER everything is up to temperature and at equilibrium for 15 minutes or so. Temperature across the glass surface is +/- 4°C. Why make it more complicated (or messy) than it needs to be?
Sublime Layers - my blog on Musings and Experiments in 3D Printing Technology and Art
Start Here:
A Strategy for Successful (and Great) Prints
Strategies for Resolving Print Artifacts
The Eclectic Angler
Re: New Heat Spreader
Yeah, I'm the newest newbie on the block, so for a while I'll be asking the dumbest of dumb questions (-:mhackney wrote:RegB, I've been using aluminum heat dissipator for over 18 months with no thermal grease or paste. It isn't needed. It would make a mess on the plate-glass side every time you took the glass off. The heat transfer from Onyx to the aluminum and to the glass is not a problem. My glass is almost dead on what the thermistor says AFTER everything is up to temperature and at equilibrium for 15 minutes or so. Temperature across the glass surface is +/- 4°C. Why make it more complicated (or messy) than it needs to be?
but given the WIDE use of thermal compounds in electronics generally.... the question bears asking.
Nice to know it isn't needed, but ...well, I just MIGHT experiment with it at some point - then eat crow (-:
15 minutes for stability isn't a LONG time to wait.
Re: New Heat Spreader
No question is a bad question, just search here and read before hand. A lot of stuff has been covered.
Bear in mind, 15 minutes is NOT how long I wait before printing. I start printing as soon as the bed hits 55°C (for PLA) by the thermistor. This takes about 50 seconds. I don't really care if I'm off by a few degrees and it certainly hasn't affected first print sticking to the PEI well.
Bear in mind, 15 minutes is NOT how long I wait before printing. I start printing as soon as the bed hits 55°C (for PLA) by the thermistor. This takes about 50 seconds. I don't really care if I'm off by a few degrees and it certainly hasn't affected first print sticking to the PEI well.
Sublime Layers - my blog on Musings and Experiments in 3D Printing Technology and Art
Start Here:
A Strategy for Successful (and Great) Prints
Strategies for Resolving Print Artifacts
The Eclectic Angler

Re: New Heat Spreader
So is it more the overall chamber temperature combined with the bed temperature that does the trick?
When on mobile I am brief and may be perceived as an arsl.
Re: New Heat Spreader
Most of us don't have a chamber per-say. The heated bed helps the first layer stick. PLA doesn't really need a heated chamber. Certain geometries (thin walls, large parts) printed in ABS will blow apart due to thermal induced stress. I mean literally Ka BOOM! A heated chamber prevents that.
Sublime Layers - my blog on Musings and Experiments in 3D Printing Technology and Art
Start Here:
A Strategy for Successful (and Great) Prints
Strategies for Resolving Print Artifacts
The Eclectic Angler
-
nitewatchman
- Printmaster!
- Posts: 626
- Joined: Thu May 01, 2014 9:51 pm
- Location: Birmingham, Alabama
Re: New Heat Spreader
Added my PEI material yesterday. It makes a huge difference AND no mess as in Glue Stick, Painters Tape, Hair Spray, ABS Soup, etc.
I should have done this a long time ago. I was just a little scared of the installation. Using a 12" x 12" square of the 468 MP tape it was not hard at all.
nitewatchman
I should have done this a long time ago. I was just a little scared of the installation. Using a 12" x 12" square of the 468 MP tape it was not hard at all.
nitewatchman
-
Eaglezsoar
- ULTIMATE 3D JEDI
- Posts: 7185
- Joined: Sun Apr 01, 2012 5:26 pm
Re: New Heat Spreader
Did you have to use soapy water etc to help you get it down evenly?nitewatchman wrote:Added my PEI material yesterday. It makes a huge difference AND no mess as in Glue Stick, Painters Tape, Hair Spray, ABS Soup, etc.
I should have done this a long time ago. I was just a little scared of the installation. Using a 12" x 12" square of the 468 MP tape it was not hard at all.
nitewatchman
“ Do Not Regret Growing Older. It is a Privilege Denied to Many. ”
-
nitewatchman
- Printmaster!
- Posts: 626
- Joined: Thu May 01, 2014 9:51 pm
- Location: Birmingham, Alabama
Re: New Heat Spreader
No soap, I tore a section about 1-1/2" wide from the tape backing and after positioning the sheet on the glass and stuck the exposed adhesive to lock in the position. Then peeled the remaining paper away from the stuck side squeegeeing it as I went. I had to slit 3 or 4 small air bubbles but it went down smoothly.
I then repeated the process with the PEI sheet peeling the paper as I flexed the PEI Sheet away from the glass. After removing all the paper, I worked it down from the stuck portion by rubbing it with my thumb. Stuck well, with no air bubbles - very smooth surface, matt side up.
If I were doing this again I would just fold about an 1" back for the initial stick and then use that for a pull handle sealing the material down as the adhesive is exposed on both faces, one at a time of course.
Trimmed the corners by deeply scoring with an X-Acto Knife and snapping it away.
nitewatchman
-
Eaglezsoar
- ULTIMATE 3D JEDI
- Posts: 7185
- Joined: Sun Apr 01, 2012 5:26 pm
Re: New Heat Spreader
Thanks for the info!nitewatchman wrote:No soap, I tore a section about 1-1/2" wide from the tape backing and after positioning the sheet on the glass and stuck the exposed adhesive to lock in the position. Then peeled the remaining paper away from the stuck side squeegeeing it as I went. I had to slit 3 or 4 small air bubbles but it went down smoothly.
I then repeated the process with the PEI sheet peeling the paper as I flexed the PEI Sheet away from the glass. After removing all the paper, I worked it down from the stuck portion by rubbing it with my thumb. Stuck well, with no air bubbles - very smooth surface, matt side up.
If I were doing this again I would just fold about an 1" back for the initial stick and then use that for a pull handle sealing the material down as the adhesive is exposed on both faces, one at a time of course.
Trimmed the corners by deeply scoring with an X-Acto Knife and snapping it away.
nitewatchman
“ Do Not Regret Growing Older. It is a Privilege Denied to Many. ”
Re: New Heat Spreader
nitewatchman wrote:No soap, I tore a section about 1-1/2" wide from the tape backing and after positioning the sheet on the glass and stuck the exposed adhesive to lock in the position. Then peeled the remaining paper away from the stuck side squeegeeing it as I went. I had to slit 3 or 4 small air bubbles but it went down smoothly.
I then repeated the process with the PEI sheet peeling the paper as I flexed the PEI Sheet away from the glass. After removing all the paper, I worked it down from the stuck portion by rubbing it with my thumb. Stuck well, with no air bubbles - very smooth surface, matt side up.
If I were doing this again I would just fold about an 1" back for the initial stick and then use that for a pull handle sealing the material down as the adhesive is exposed on both faces, one at a time of course.
Trimmed the corners by deeply scoring with an X-Acto Knife and snapping it away.
nitewatchman
Nitewatchman,
Just so I am sure to understand, you put the copper sheet between the Onyx and glass, and then used a 12x12 double sided tape (468MP) to attach the 12x12 sheet of PEI on top of the glass? I am assuming you do this to help with ABS sticking, how does it do with the nylons and PLA? Does the PEI get up to temp like the glass normally would? Thanks!
-
nitewatchman
- Printmaster!
- Posts: 626
- Joined: Thu May 01, 2014 9:51 pm
- Location: Birmingham, Alabama
Re: New Heat Spreader
Yes, the stackup is the Onyx Bed, then the Copper plate, then the borosilicate glass plate, then the adhesive sheet and finally the PEI (0.030").
Nearly as I can measure there is a 3 to 5C temperature difference between the embedded thermistor and a surface skin reading on the PEI surface and no noticable lag in heating. Best thing however is the uniformity of heat across the bed surface. After operating a few minutes the heat variation is only 3C or so from extreme edge to center or anywhere on the build surface. The build surface also has good heat capacity, once it is has been at heat for a few minutes and soaked there no variance or flucuation in the bed temperature at all. I think one other step that I will take to help the bed heat is to insulate the bottom of the Onyx and snowflake. I discovered last night that after long periods of operation the bottom of the top base plate inside the base gets quite warm, mine was running about 45C (area over the Power Supply Fan was 52C) and the temperature of the closed up base was much too hot. I have ordered two 80mm 5VDC fans to be added into the removable back side panels to get some of this heat out. Insulating should also help with it not getting in to start with.
As to printing, I have no experience with Nylon. However ABS and PLA are a different story. I have used Glue Stick, Hair Spray and ABS Soup, the PEI easily outperforms them all without the mess. For ABS at times the stick has been too good, this morning a section of the bottom of an ABS part tore away rather than let go of the cold bed. I suspect that I printed this with the bed temperature too hot (bed at 98C and the Hot End at 230C). Normally after the bed cools, ABS parts just snap right off. PLA works equally as well I, print at 60C on the bed and 210C on the Hot End and after cooling these also come off freely.
nitewatchman
Re: New Heat Spreader
Thanks for the detailed information. I am going to try the copper plate and PEI as well.
For insulation, I am wondering if something like a solar blanket that was trimmed down and put underneath the snowflake would be enough to redirect the heat upwards?
I am probably going to have to upgrade my power supply too. I was able to get to 90C in about 30 minutes, but now it shuts down (times out?) before it gets there. I tried to set it for 120C just to see what would happen and it gets to about 80C and turns off. I suspect the power supply is degrading but haven't lifted the bed to check voltages.
-
nitewatchman
- Printmaster!
- Posts: 626
- Joined: Thu May 01, 2014 9:51 pm
- Location: Birmingham, Alabama
Re: New Heat Spreader
A solar blanket is a good idea, had not even thought in that direction. Seems like a lot of heat is radiating down, it has to help if it can be turned the other way.
My Rev.2 Bed heats to 95C now in 7 to 9 minutes, a little slower since adding the PEI. The system uses a Corsair RM750 Modular Power Supply. This is a power supply with a single 12VDC rail that can deliver 60A+. Four of the Modular +12VDC output wires and four of the ground wires are spliced to a pair of #14AWG wires that are connected to the Rambo Controller for the heated bed circuit. The wires are spliced using a Wago 222-415 - 5 Conductor Lever Nuts. The output of the Rambo controller is then connected to the Oynx Bed using a second pair of #14 AWG wires provided with an XT-60 power connector for easy removal.
Doesn't require any dish towels, napkins, magazines or other debris to get to heat.
http://www.amazon.com/Wago-222-415-LEVE ... go+222-413" onclick="window.open(this.href);return false;
http://www.amazon.com/NEEWER%C2%AE-Fema ... connectors" onclick="window.open(this.href);return false;
Your mileage may vary.
nitewatchman
-
Eaglezsoar
- ULTIMATE 3D JEDI
- Posts: 7185
- Joined: Sun Apr 01, 2012 5:26 pm
Re: New Heat Spreader
Those are some nice connectors. 1st time I have seen that particular type.
Thanks for the info and the links.
Thanks for the info and the links.
“ Do Not Regret Growing Older. It is a Privilege Denied to Many. ”
Re: New Heat Spreader
Thanks again nitewatchman! Do you use that PS for all the rambo juice or are you running two power supplies?
Also I am wondering if it would be a bad idea to just use short jumpers on the rambo to go from where your 14 ga wire comes in with 12v and then use a short wire from there to the other two feeds on the rambo power connector and do the same with ground. I imagine that might damage the rambo or bypass the 15A fuse somehow? Maybe not..
Also I am wondering if it would be a bad idea to just use short jumpers on the rambo to go from where your 14 ga wire comes in with 12v and then use a short wire from there to the other two feeds on the rambo power connector and do the same with ground. I imagine that might damage the rambo or bypass the 15A fuse somehow? Maybe not..
-
nitewatchman
- Printmaster!
- Posts: 626
- Joined: Thu May 01, 2014 9:51 pm
- Location: Birmingham, Alabama
Re: New Heat Spreader
The RM750 powers everything. It has more than ample power and plenty of outputs that can be tapped. Additionally, since the wiring is modular, you only use the wire, that you require. I clip off the end plugs and the unused wires from the individual cables and place the wires inside a braided sheath. This makes wire management much easier and cleaner, plus it really reduces the number of wires crammed behind the Rambo Card.
Sure, you could jump all the Rambo input feeds from the two Bed Plate supply wires. The Rambo card will never know the difference. The Corsair Power Supply is a single rail 12VDC source and all the 12V's come from the same components so electrically they are all the same regardless of how they are connected. The difficulty however would be in physically fitting the wires into the terminals. The #14 wire pretty much fills it up.
Since the modular wiring out of the Corsair has 40 available 12VDC wires that can be tapped, I just grabbed two more for the other two Rambo inputs. Still leaves lots of reserve for stepper cooling fans, base cooling fans, lights, connecting a Turbo-Encabulator, etc. The 750watt power supply is overkill for this application but were it up to me cars and trucks would be required to have a minimum engine size of 7 Liters.
https://www.google.com/search?q=corsair ... B900%3B497" onclick="window.open(this.href);return false;
https://www.google.com/search?q=corsair ... B650%3B498" onclick="window.open(this.href);return false;
nitewatchman
Re: New Heat Spreader
Nitewatchman, thanks for all the info. I did order and install the RM750 tonight. I used the 14 gauge wire and had already done so from the heated bed to the rambo during the initial build. I did a test run of the bed to 90C and timed it.
I got up to about 82C before it killed, I assume due to timeout. It was around 20 minute mark. I am wondering if you did anything as far as putting a load on the 5V or 3.3 V rails. I have read conflicting information if it is necessary or not. Also the Power OK lines.
I was really hoping this would speed up the bed heat process! I measured the resistance of the bed itself and it's 0.8 ohms so I think I am good there. I have 14 Gauge wire through out. I also got the copper plate (from Amazon Supply though since it was $39 shipped) and the PEI and transfer tape. Looking forward to trying that out once I get this PS sorted out.
Thanks for any direction!
Mike